AdonisJS has been my framework of choice to get stuff done quickly. The framework has taken a turn for the good with more frequent updates to its latest version - v5, which features Typescript, the same trusted MVC framework, and “everything & kitchen sink” approach that is quite effective to easily build apps.
In this post we will create a simple news website using AdonisJS. The focus will be on -
- Creating a site that is publisher-friendly
- Login/auth and publish functions
- Support user authentication for creating news articles
- Basic styling with a classless framework - we will choose milligram at this time
Here’s how the app will look like -
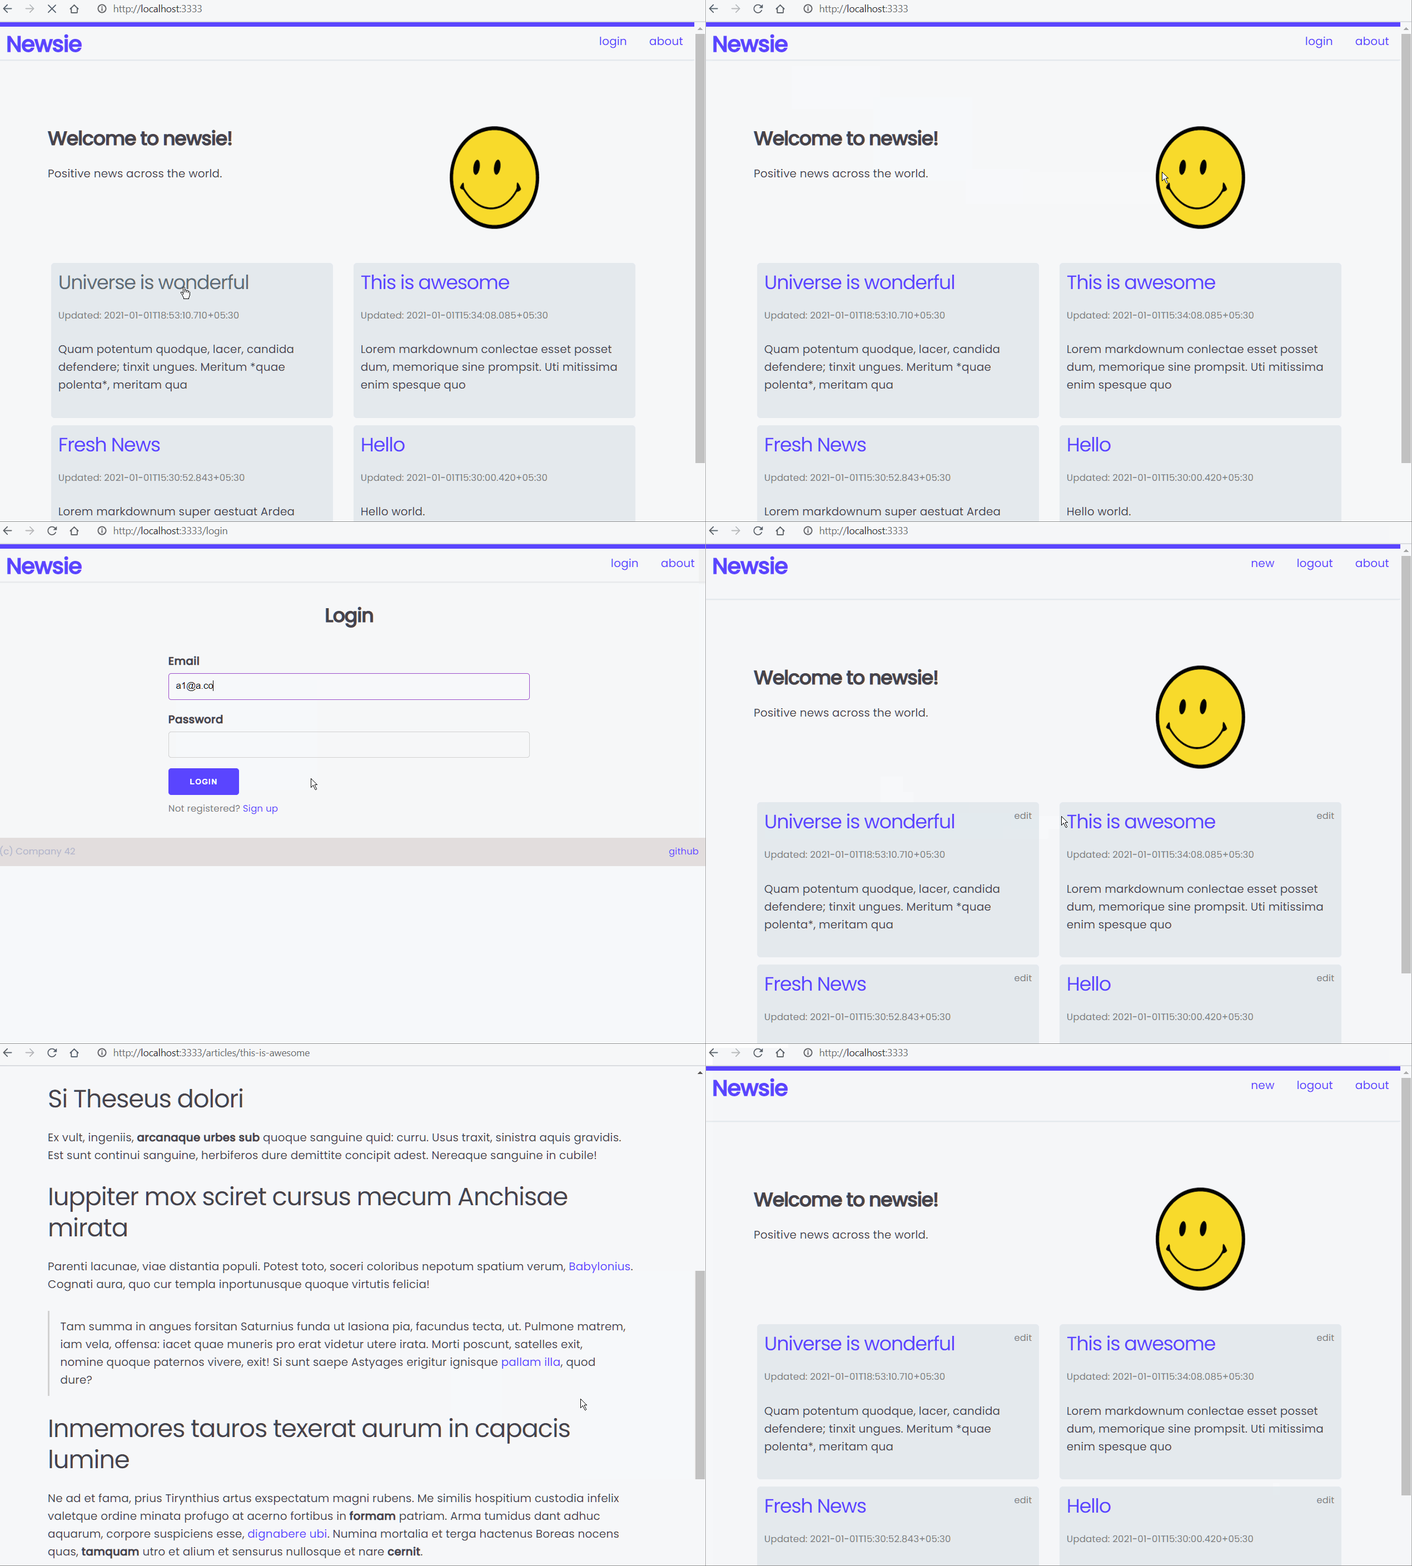
Let’s get rocking.
Why AdonisJS?
While there are no dearth of frameworks in NodeJS, you may want to consider AdonisJS -
- Be productive with many decisions made for you. Start creating your apps rather than spending time on tying up various libraries and packages
- Create structured, methodical and easy-to-understand code
- Use a view layer that can enable you to build something quickly. Or, enable APIs that can be consumed by your SPA or mobile apps
There is no dearth of frameworks using NodeJS, and I am a super fan of Node because of that. But AdonisJS has held its own with its developer-friendly approach, similarity with Laravel (which is a super-productive way to do things), and, of course, with the power of Javascript/Typescript.
Get Started: Installation
Ensure you have NodeJS installed on your computer. Download Node and follow installation instructions if you are into such type of thing.
Although not strictly required, I recommend you choose a nice database to go along with your app. You can choose from Postgres, MySQL, Oracle, or SQLite. Take help from our dear friend, Google, to find out how to install DBs. Or, just download Laragon that does all the hard work, and expects you to just start the darn thing.
We are now ready to start creating the app. Create your Adonis app with a simple command.
npm init adonis-ts-app newsie
The command creates a folder called ’newsie’ and takes you through a few options.
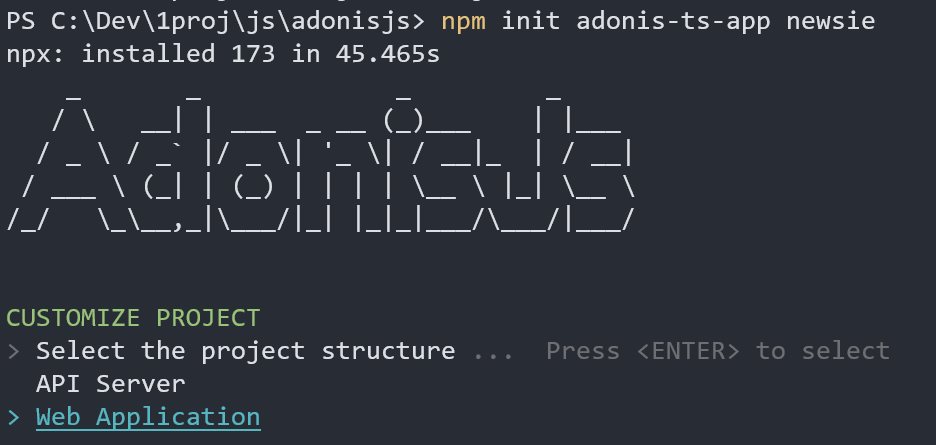
We will create a Web Application for the news site. The other option is to choose an API, which can be useful to build a single page application (among other things). Choose defaults for other options, or roll a dice to choose values for you. The wizard only asks your input to use ESLint (y) and, possibly, Prettier at this time.
Navigate to the project folder and open the folder in VSCode.
Next, we install a package to enable connecting to a database.
npm i --save @adonisjs/lucid@alpha
Invoke the configurator.
node ace invoke @adonisjs/lucid
The command will allow you to choose your database, sets up a few essentials, and provide instructions on changing configuration. Follow the instructions to update env.ts file - add below lines to the file:
export default Env.rules({
  // ...
  PG_HOST: Env.schema.string({ format: "host" }),
  PG_PORT: Env.schema.number(),
  PG_USER: Env.schema.string(),
  PG_PASSWORD: Env.schema.string.optional(),
  PG_DB_NAME: Env.schema.string(),
  // ...
});
Open .env file in your project folder and change below lines (varies depending on your options - I chose Postgres).
DB_CONNECTION=pg
PG_HOST=localhost
PG_PORT=5432
PG_USER=postgres
PG_PASSWORD=
PG_DB_NAME=newsie
The above configuration tells Adonis to connect to Postgres DB called newsie running on localhost port 5432, using the user postgres.
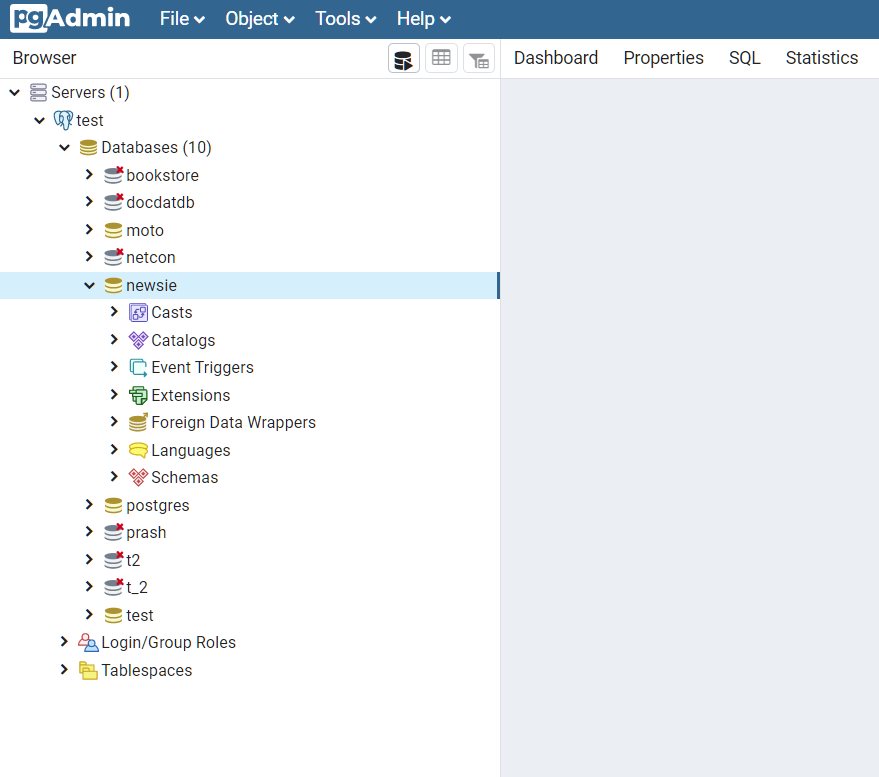
Create a new database called newsie in your database server. You can use a client like HeidiSQL or use an application that is bundled with your database (e.g. pgAdmin4 that comes with Postgres).
Start your app.
node ace serve --watch
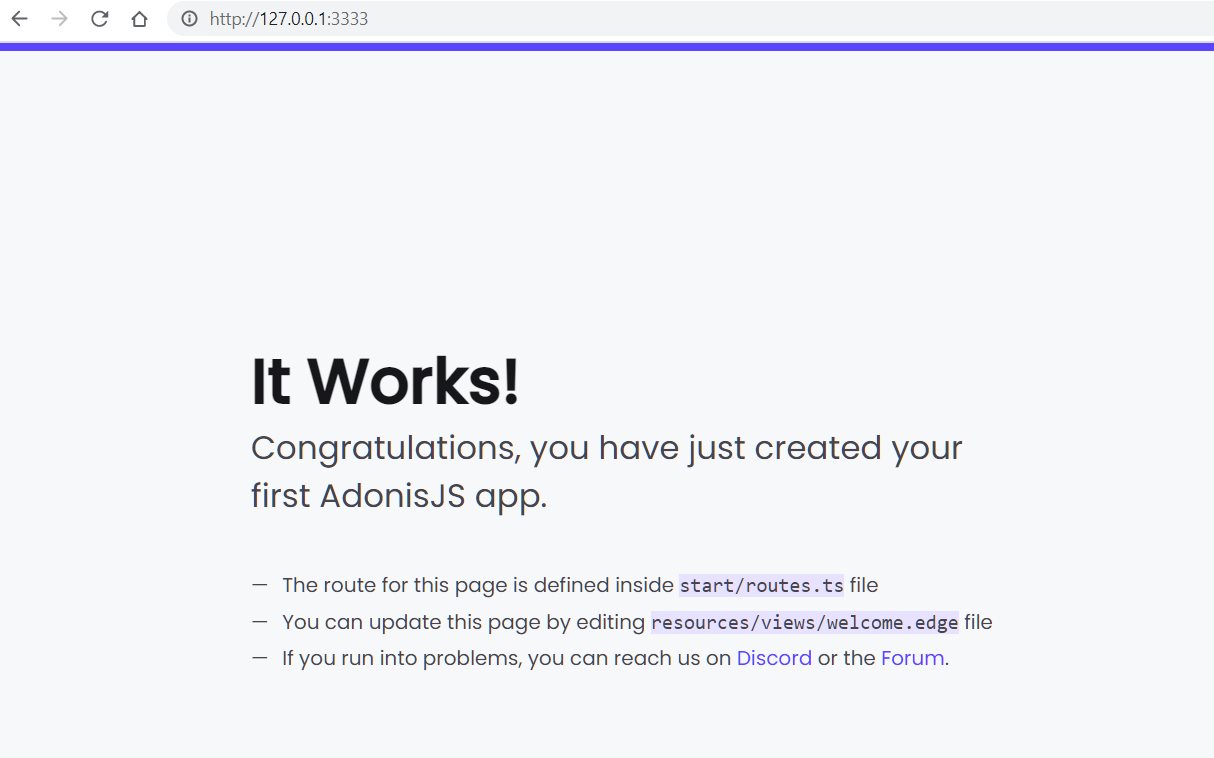
The --watch flag watches for any changes in the project and automatically restarts Adonis server. You can now point your browser to and see the below glorious page.
We now move on to developing the app.
First Steps: Develop Article Functionality
AdonisJS is a MVC framework. That means that our application uses a pattern that consists of three main logical layers -
- A model layer that takes care of all things database. Create your data structure, define relationships and so forth
- A controller layer that allows you to create logic to write and retrieve data through the model layer
- A view layer that takes care of presenting data to the user
While this may sound too complex in the beginning, it’s really making things easier (and standardized) for building real-world applications.
Sidenote: There are arguably better, simplified architectures available today for building apps. MVC is still my go-to pattern since I find it easier to understand, can provide guidance and training to others to get started quickly, and there is a structure to everything in complex applications.
Create Article Model
Let us add a component to store and allow interactions with articles, which is aptly called Article. We can create the model, controller and what is called a “migration file” in one go.
node ace make model Article -cm
The command will do three things -
- Create a model called
Article.ts - Create an associated controller called
ArticlesController.tsinapp\Controllers\Http\folder - Create
<a_wierd_number>__articles.tsmigration file indatabase\migrations\folder. We can use this migration file to create tables in the database. It is simpler this way since we will be adding new fields, migrating from our dev to production environment, etc. and having a file is easier to manage than using database migration tools
Yes, the names of model, controller and the table created through the migration file is similar. Yes, you can change that behaviour though I don’t know why you would do that.
Open the migration file and add a few fields.
import BaseSchema from "@ioc:Adonis/Lucid/Schema";

export default class Articles extends BaseSchema {
  protected tableName = "articles";

  public async up() {
    this.schema.createTable(this.tableName, (table) => {
      table.increments("id");
      table.timestamps(true);
      table.string("title");
      table.text("content");
      table.dateTime("publish_date");
    });
  }

  public async down() {
    this.schema.dropTable(this.tableName);
  }
}
The first two lines for increments and timestamps already existed in the file - they signify to the app that we will use a unique id field that is auto-incremented, and we will also use a created_at and updated_at fields that track created and modified dates. We add a couple of more fields and save the file.
Run the migration.
node ace migration:run
You will find a new table in your database with the specified fields.
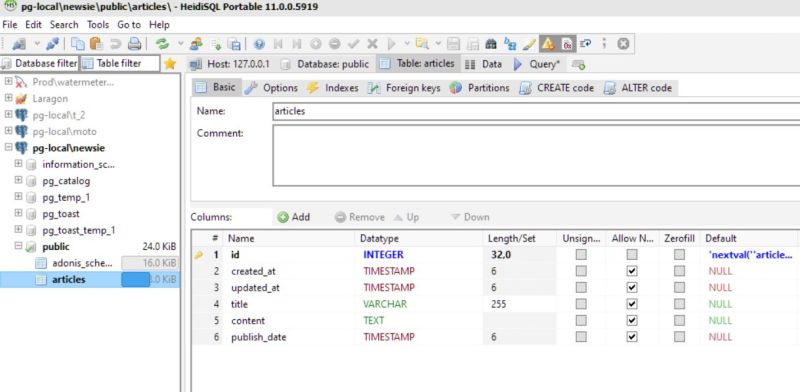
So far we created columns in a table, but the application wouldn’t know what to do with them unless we change the model.
Edit app/Models/Article.ts to add more fields.
// ...

@column()
public title:String

@column()
public content:String

@column.dateTime()
public publishDate: DateTime
Create Article Controller
You can display a static page without data without any help from controller. But, a real-world app contains data, needs some business logic to be applied, security rules to be enforced and so on. Controller is the place to do all this.
We previously generated the controller file for Article while creating the model. Open app/Controllers/ArticleController.ts -
import { HttpContextContract } from "@ioc:Adonis/Core/HttpContext";

export default class ArticlesController {
  public async index({}: HttpContextContract) {}

  public async create({}: HttpContextContract) {}

  public async store({}: HttpContextContract) {}

  public async show({}: HttpContextContract) {}

  public async edit({}: HttpContextContract) {}

  public async update({}: HttpContextContract) {}

  public async destroy({}: HttpContextContract) {}
}
The file consists of a bunch of functions to facilitate all possible data operations. This controller can be reached through user (or app) actions.
The start/routes.ts file outlines the various resource operations that your Adonis app supports. Let us add a line to inform Adonis of our controller.
// ...

Route.get("/articles", "ArticleController.index");
In plain English: whenever someone tries to go to <app>/articles, invoke index function in ArticleController.
Change index function to return something.
public async index({}: HttpContextContract) {
    return 'This is article.'
}
Point your browser to http://localhost:3333/articles/ to see your message. Of course, we can do much more with controllers. Let us retrieve what we have in our articles table and try to show the contents.
Change index function to -
public async index({}: HttpContextContract) {
    const articles = await Article.all()
    return articles
  }
You will see more of these statements in a short while, but here’s a rundown -
- Get all articles through the
Articlemodel - Return articles
That’s about it. If you go to http://localhost:3333/articles/, you will now see a grand [] as the output. It is an empty array since we don’t have any records in the table. At this stage, you could create a few records directly in the table and see those records in the browser, or just wait for the next steps to start creating articles through the app.
Create Article View
Let us now turn focus to display the article through a view. Inspect resources/view/welcome.edge, which is a simple view file. Adonis views use edge templating language - we will see more of it soon.
You would have observed previously that http://localhost:3333 in the browser opens up the welcome view. This is done through start/routes.ts file, specifically with the below line.
// ...
Route.on("/").render("welcome");
This tells the application to serve a page welcome that will be sent to the browser when user accesses the root page.
Just for fun, create a new file in the same folder resources/view/hello.edge.
hello world
Add a different route to the start/routes.ts file.
// ...
Route.on("/hello").render("hello");
Navigate to http://localhost:3333/hello to see your new page. It’s as simple as that.
In the previous section, you had seen that we had invoked the ArticleController.index() method to return something to the view. The difference?
- Controller can retrieve data and pass it back to view
- A view can simply show content - data, images or any HTML that you write therein
- Data returned by controller is not directly displayed on the browser. You will pass it along to the view layer to make sense out of that data and display the beautified, organized content to users
Let us improve our display a bit.
First, we will take a decision to show articles on the front page. So, let us change welcome.edge. Change the body section to -
<body>
  <main>
    <div>
      <h1 class="title">Welcome to newsie!</h1>
      <p class="subtitle">Positive news across the world.</p>

      @!section("page")
    </div>
  </main>
</body>
Create a new view resources/views/articles/index.edge.
<!-- prettier-ignore -->
@layout("welcome")

@section("page")
<ul>
  @each(article in articles)
  <a href="">
    <h3>{{ article.title }}</h3>
  </a>

  @endeach
</ul>
@endsection
Notice that we used the same section names in both welcome.edge and index.edge. As you would have guessed, we pass articles from the controller. Rest of the statements just take care of rendering the article content (ignore the empty href tag - we’ll come back to this).
Let us change the routes.ts file to point to the ArticlesController. We can remove the previously used /articles route for now. The routes.ts file will now have -
import Route from "@ioc:Adonis/Core/Route";

Route.get("/", "ArticlesController.index");
Route.on("/hello").render("hello");
Edit index function in ArticlesController.ts to return the view rather than plain data.
public async index(ctx: HttpContextContract) {
    const articles = await Article.all()
    return ctx.view.render('articles/index', { articles })
}
Here’s what changed -
- We are returning the view instead of data
- We pass the data along to the view (and the view can render data in a good way)
Refresh the page and see the list of articles.

Tie articles to the article list
We have to link the list of articles so that we can display content when the user clicks on the link.
Web is just a bunch of links.
- Mr. Smarty Pants
Let us create a new detail page that can display article content. Create a new view resources/views/articles/_id.edge.
<!-- prettier-ignore -->
@layout("welcome")

@section("page")
<article>
  <h1>{{ article.title }}</h1>

  <section>{{ article.content }}</section>
</article>
@endsection
You know the drill by now - update controller to display this page, which in AdonisJS is the show method.
public async show(ctx: HttpContextContract) {
    const article = await Article.find(ctx.params.id)
    return ctx.view.render('articles/_id', { article })
}
Article.find(ctx.params.id) finds a specific article by querying with id. Then, we return the view by passing the said article details to the view.
Remember that I had asked you to ignore the href tag earlier? Let us change that -
<!-- prettier-ignore -->
@layout("welcome")

@section("page")
<ul>
  @each(article in articles)
  <a href="{{ route('ArticlesController.show', {id: article.id})}}">
    <h3>{{ article.title }}</h3>
  </a>

  @endeach
</ul>
@endsection
Navigate to the root and click on any news link to see the new detail page.
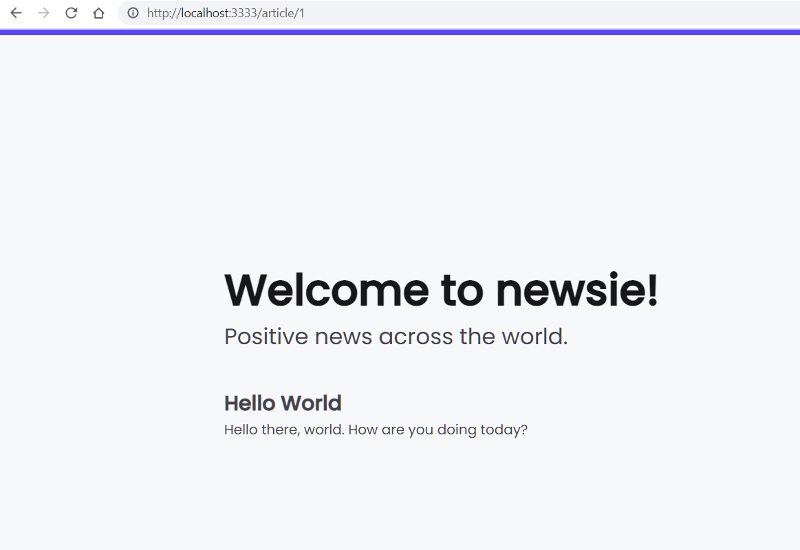
We have now tied all loose ends -
welcomeis just a container that shows the actual viewarticles/indexarticles/index.edgeshows a list of articles- When user hits the home page (
localhost:3333),route.tsinvokesArticlesController.index ArticlesController.indexqueries for all articles and passes it toarticles/index.edgeto render- Clicking on a link in
articles/indexwill use a route helper to invokeArticlesController.showand passes the article id to the view ArticlesController.showwill returnarticles/_id.edgeview that will display the article content
At a high-level:
- Router ties the route in the URL (e.g.
/,/article/1) to a specific action (or can render the view directly) - Actions are implemented in controllers
- Controller queries for data and passes it to a view to render the UI
We have created UI and functionality for listing posts and showing a specific post, but we have gone through 75% of all there is to learn :)
Before we go any further, let us style our application a bit.
Styling your AdonisJS app
Styling a server-generated app is as simple as including the CSS libraries and sprinkling them classes everywhere. While styles can be as complex as they come, I will choose to use a simple, class-less style library in Milligram.
Add this one line to the base container.
<link
  rel="stylesheet"
  href="https://cdnjs.cloudflare.com/ajax/libs/milligram/1.4.1/milligram.css"
/>
Let us create a new css file public/css/styles.css and add that to the mix for customisations. We will not quite discuss styling here - copy and paste CSS from the Github repo. Add this file to the page.
<link
  rel="stylesheet"
  href="https://cdnjs.cloudflare.com/ajax/libs/milligram/1.4.1/milligram.css"
/>
<link rel="stylesheet" href="/css/styles.css" />
While we are here, let us rename the container (welcome.edge) to app.edge since that is more near to what the file function is.
Remember to change references to welcome.edge in all views.
Enable Authentication
We need our app to support authentication since only registered users can create news articles. Fortunately, Adonis has a powerful authentication module that comes alive with a few code changes.
First, install the additional packages required for auth.
npm i @adonisjs/auth@alpha phc-argon2 phc-bcrypt
Configure auth with the below command.
node ace invoke @adonisjs/auth
Select Web option since we are like to keep things simple. Follow post configuration instructions to change specific sections in kernel.js.
Server.middleware.register([
  "Adonis/Core/BodyParserMiddleware",
  "App/Middleware/SilentAuth",
]);

Server.middleware.registerNamed({
  auth: "App/Middleware/Auth",
});
Enable UI for Login & Registration
Change the base layout app.edge to include links to login & logout links.
<main>
    <nav class="navbar">
      <h3 class="logo"><a href="/">Newsie</a></h3>
      <ul>
        <li><a href="/about">about</a></li>
        @if(auth.user)
        <li>
          <a href="/logout" onclick="event.preventDefault();document.getElementById('logout').submit()">
            logout
            <form id="logout" action="/logout" method="POST">{{ csrfField() }}</form>
          </a>
        </li>
        <li><a href="/articles/new">new</a></li>
        @else
        <li><a href="/login">login</a></li>
        @endif

      </ul>
    </nav>
    <div class="content">
      @!section("page")
    </div>
  </main>

  <footer>
    (c) Company 42
    <span style="float:right"><a href="https://github.com/prashanth1k/newsie-adonisjs-sample-app">github</a></span>
  </footer>
</body>
</html>
Remember that edge file supports calculations and inclusion of variables. In addition, we can include simple conditional logic as well. @if(auth.user) checks if a specific object exists and renders the lines until else or endif if the condition is true. We are using the conditional rendering to show login link only if user is not logged in yet.
csrfField() is a security function provided by AdonisJS to prevent cross-site forgery. We will use it for all update requests (e.g. POST, PUT, etc.)
User Data Model
Create user model similar to articles -
node ace make model User -cm
Change the table migration file database/migrations/<some_num>_users.ts to -
import BaseSchema from "@ioc:Adonis/Lucid/Schema";

export default class Users extends BaseSchema {
  protected tableName = "users";

  public async up() {
    this.schema.createTable(this.tableName, (table) => {
      table.increments("id");
      table.timestamps(true);

      table.string("email").notNullable();
      table.string("password", 180).notNullable();
      table.string("name");
      table.string("remember_me");
    });
  }

  public async down() {
    this.schema.dropTable(this.tableName);
  }
}
Run migrations -
node ace migration:run
Change app/Models/user.ts to -
import { DateTime } from "luxon";
import { BaseModel, column, beforeSave } from "@ioc:Adonis/Lucid/Orm";
import Hash from "@ioc:Adonis/Core/Hash";

export default class User extends BaseModel {
  @column({ isPrimary: true })
  public id: number;

  @column.dateTime({ autoCreate: true })
  public createdAt: DateTime;

  @column.dateTime({ autoCreate: true, autoUpdate: true })
  public updatedAt: DateTime;

  @column()
  public name: string;

  @column()
  public email: string;

  @column()
  public password: string;

  @column()
  public rememberMeToken?: string;

  @beforeSave()
  public static async hashPassword(user: User) {
    if (user.$dirty.password) {
      user.password = await Hash.make(user.password);
    }
  }
}
hashPassword will hash plain password so that we can securely store it in our database.
User Login and Registration Controllers
Change code in app/Controllers/UsersController.ts.
Login
Add code to handle login events.
public async login({ request, response, auth, session }: HttpContextContract) {
    try {
      await auth.attempt(request.input('email'), request.input('password'))
      return response.redirect('/')
    } catch (e) {
      session.flash('notification', 'Login failed. Check email/password & retry.')
      return response.redirect('back')
    }
  }
Note that -
await auth.attempt()tries to login using id/password provided by front-endsession.flashhelps send messages from the business layer back to UI. We will make use ofnotificationin the edge file- successful login will direct user to
/= home page. Errors will just go back to the login page
Register
It is quite common to validate data sent by the frontend in controllers / models. AdonisJS provides an easy way to validate data but that is not included by default.
Let us install the Adonis Shield package to enable validation in our app -
npm i @adonisjs/shield@alpha --save
Configure shield.
node ace invoke @adonisjs/shield
Follow instructions to register 'Adonis/Addons/ShieldMiddleware' in start/kernel.ts file.
Server.middleware.register([
  "Adonis/Core/BodyParserMiddleware",
  "Adonis/Addons/ShieldMiddleware",
  "App/Middleware/SilentAuth",
]);
Now you can include functionality provided by shield in your edge files.
Add another method in UsersController.ts to support registration function -
public async register({ request, auth, response, session }: HttpContextContract) {
    const valSchema = schema.create({
      email: schema.string({ trim: true }, [
        rules.unique({ table: 'users', column: 'email' }),
        rules.maxLength(255),
        rules.email(),
      ]),
      password: schema.string({ trim: true }, [rules.maxLength(180), rules.required()]),
    })

    const data = await request.validate({
      schema: valSchema,
      messages: {
        'email.unique': 'Email already exists',
        'email.maxLength': 'Email can be upto 255 characters',
        'email.email': 'Invalid email',
      },
    })
    const user = await User.create({
      email: data.email,
      password: data.password,
    })

    await auth.login(user)
    session.flash('notification', 'Registered.')
    return response.redirect('/')
  }
This is very similar to the login method, but has a few more goodies.
const valSchema = schema.create() enables us to easily create custom validation rules and messages using Adonis Shield. We check whether the email already exists, email is a valid email string and whether it has max 255 characters. If all validations pass, we login the user and redirect them to the home page.
Both the methods described so far provide the control layer. We need to render the views as well.
Show Login and Register Pages
Add two more methods to show login and registration screens.
public async showLogin({ view }: HttpContextContract) {
  return view.render('auth/login', { user: { email: '', password: '' } })
}

public async showRegister({ view }: HttpContextContract) {
  return view.render('auth/register', { user: { name: '', email: '', password: '' } })
}
We pass dummy objects like user: { email: '', password: '' } to demonstrate that we could pass predefault strings to the UI if desired.
Before we forget - code the logout event as well..
public async logout({ auth, response }: HttpContextContract) {
  await auth.logout()
  return response.redirect('/')
}
User Login and Registration UI
Create edge views to enable user to login / register.
Sign up screen
Create a new file resources/views/auth/register.edge. Input below code -
@layout("app")

@section("page")
<div style="padding-left: 20%;padding-right: 20%">
    <h3 class="article-title">Sign up</h3>
    @if(flashMessages.has('errors.email'))
    <p class="error-text">
        {{flashMessages.get("errors.email")}}
    </p>
    @endif
    @if(flashMessages.has('notification'))
        <p class="info-text">
            {{flashMessages.get("notification")}}
        </p>
    @endif
    <form action="{{ `/register`}}" method="POST">
        {{ csrfField() }}
        <label for="name">Name</label>
        <input type="text" value="{{user.name}}" name="name" required>
        <label for="title">Email</label>
        <input type="text" value="{{user.email}}" name="email" required>
        <label for="password">Password</label>
        <input type="password" value="{{user.password}}" name="password" required>

        <button type="submit">Sign up</button>

    </form>

</div>
@endsection
Note that -
- We continue using
app.edgeas the base layout - We used
flashMessagesto provide a way to show error messages and notifications on the UI
Login screen
Create a new file resources/views/auth/register.edge. Input below code -
@layout("app")

@section("page")
<div style="padding-left: 20%;padding-right: 20%">
    <h3 class="article-title">Login</h3>
    <article>
        @if(flashMessages.has('errors.title'))
        <p class="error-text">
            {{flashMessages.get("errors.title")}}
        </p>
    @endif
    @if(flashMessages.has('notification'))
        <p class="info-text">
            {{flashMessages.get("notification")}}
        </p>
    @endif
    <form action="{{ `/login`}}" method="POST">
        {{ csrfField() }}
        <label for="title">Email</label>
        <input type="text" value="{{user.email}}" name="email" required>
        <label for="password">Password</label>
        <input type="password" value="{{user.password}}" name="password" required>

        <button type="submit">Login</button>
        <div class="article-meta"> Not registered? <a color="grey" href="/register">Sign up</a></div>
    </form>

</div>
@endsection
User Routes
Add below routes to start/routes.ts.
Route.post("/login", "UsersController.login");
Route.get("/login", "UsersController.showLogin");
Route.post("/register", "UsersController.register");
Route.get("/register", "UsersController.showRegister");
Route.post("/logout", "UsersController.logout");
And.. you are done just like that. Try out logging in / signin up to use the application.
Do More With Articles
While our articles functionality is all powerful, our app still lacks a few things-
- We can provide a way to see “proper” URLs for individual articles. A “slug” is a URL-friendly article id that is easier to read
- Articles do not have any formatting now. We will support markdown content editing for easier content authoring / assimilation
- Make the user experience and navigation better
Let’s get to it.
List Articles
The home page shows a bunch of links right now. Change that to display news cards with a title and content preview.
Modify resources/views/articles/index.edge -
<!-- prettier-ignore -->
@layout("app")
@section("page")

<section class="hero">
  <div class="row">
    <div class="column">
      <h3 class="title">Welcome to newsie!</h3>
      <p class="subtitle">Positive news across the world.</p>
    </div>
    <div class="column center">
      <img
        src="/images/smiley.png"
        style="width:150px;height:150px;margin:auto;"
        class="column"
      />
    </div>
  </div>
</section>

<div class="row row-wrap">
  @each(article in articles)
  <div class="column column-50">
    <aside class="card">
      @if(auth.user)
      <a href="/articles/{{article.id}}/edit" class="article-meta-small"
        >edit</a
      >
      @endif
      <h3>
        <a href="{{ route('ArticlesController.show', {id: article.slug}) }}">
          {{ article.title }}
        </a>
      </h3>
      <p class="article-meta">Updated: {{article.publishDate}}</p>

      <p>{{{ article.content ? article.content.substring(0,100) : "" }}}</p>
    </aside>
  </div>
  @endeach
</div>
@endsection
A couple of interesting things to note -
- There is an
editlink at the top of each article. This shows up only for logged in users - We use a “route helper” in
<a href="{{ route('ArticlesController.show', {id: article.slug}) }}">to directly refer to the AdonisJS route rather than use the URL to reach the article detail view
Show Article Detail
There are two changes to be done at this time -
- Treat content in
contentas markdown. To render markdown in HTML, we use a package called “marked”. - Let us start using a “slug” instead of a cryptic “id” field in URL. We will use a package called “slugify” to convert title to a slug
Install packages -
npm i marked slugify
Modify the model app/Models/Article.ts -
// other lines
export default class Article extends BaseModel {
  // other lines

  @computed()
  public get fmtContent() {
    const marked = require("marked");
    return this.content ? marked(this.content) : "";
  }
  // other lines

  @beforeSave()
  public static async slugify(article: Article) {
    const slugify = require("slugify");

    if (!article.$original.slug && !article.$attributes.slug) {
      article.slug = slugify(article.title, { lower: true, strict: true });
    } else if (article.$dirty.slug) {
      article.slug = slugify(article.slug, { lower: true, strict: true });
    }
  }
}
The changes are fairly straight-forward. We created a computed field to convert markdown to HTML (which can inturn be used in our views), and auto-filled the slug before saving the record.
Change resources/views/articles/_id.edge that shows the detail article to -
<!-- prettier-ignore -->
@layout("app")

@section("page")
<div>
  @if(auth.user)
  <a class="article-meta-small" href="/articles/{{article.id}}/edit">edit</a>
  @endif
  <h1 class="article-title">{{ article.title }}</h1>
  <article>{{{ article.fmtContent }}}</article>
</div>
@endsection
Note that we have now used fmtContent and {{{ }}} notation to directly create HTML based on the field content.
Create Article
Create a new view resources/views/articles/new.edge and input below code -
<!-- prettier-ignore -->
@layout("app")

@section("page")
<div>
  <h3 class="article-title">New Article</h3>
  <article>
    @if(flashMessages.has('errors.title'))
    <p class="error-text">{{flashMessages.get("errors.title")}}</p>
    @endif @if(flashMessages.has('notification'))
    <p class="info-text">{{flashMessages.get("notification")}}</p>
    @endif
    <form action="/articles/" method="POST">
      {{ csrfField() }}
      <label for="title">Title</label>
      <input type="text" value="{{article.title || ''}}" name="title" />
      <label for="slug">Slug</label>
      <input type="text" value="{{article.slug || ''}}" name="slug" />

      <label for="content">Post Content</label>
      <textarea type="text" name="content" rows="10">
        {{ article.content || '' }}
      </textarea>

      <button type="submit">Save</button>
    </form>
  </article>
</div>
@endsection
Nothing we haven’t seen before.
Update Article
Create a new view resources/views/articles/edit.edge to edit a given article. In our case, the code here will be almost same as new. Input below code -
<!-- prettier-ignore -->
@layout("app")

@section("page")
<div>
    <h3 class="article-title">Update Article</h3>
    <article>
    @if(flashMessages.has('errors.title'))
    <p class="error-text">
        {{flashMessages.get("errors.title")}}
    </p>
    @endif
    @if(flashMessages.has('notification'))
        <p class="info-text">
            {{flashMessages.get("notification")}}
        </p>
    @endif
    <form action="{{ `/articles/${article.id}?_method=PATCH`}}" method="POST">
        {{ csrfField() }}
        <label for="title">Title</label>
        <input type="text" value="{{article.title}}" name="title">
        <label for="slug">Slug</label>
        <input type="text" value="{{article.slug}}" name="slug">

        <label for="content">Post Content</label>
        <textarea type="text" name="content" rows="10">{{article.content}}</textarea>

        <button type="submit">Save</button>

    </form>

</div>
@endsection
_method=PATCH in form action is what is called as “method spoofing”. This allows us to send a patch method in the HTTP POST request. You need to enable method spoofing in AdonisJS by making the below configuration change in app.ts -
allowMethodSpoofing: true;
Article Routes
Finally, change the article routes.
Let us -
- Support edit, update and new routes to views created so far
- Require user to be logged in to create or update articles
Modify app/start/routes.ts -
Route.get("/", "ArticlesController.index");
Route.on("/about").render("about");

Route.group(() => {
  Route.get("/new", "ArticlesController.create");
  Route.get("/:id/edit", "ArticlesController.edit");
  Route.patch("/:id", "ArticlesController.update");
  Route.post("/", "ArticlesController.store");
})
  .prefix("articles")
  .middleware("auth");

Route.get("/articles/:id", "ArticlesController.show");
The auth middleware included in the route group takes care of checking for valid user and redirecting user to login screen if not already logged in. Anonymous users can just view the article list and browse articles.
We are done with all changes required to provide a cool-looking app to create, edit and view news articles.
Finis
While getting to the finish line took a few hundred lines, you will get used to the steps required to enable functionality in AdonisJS in no time. If you have experience with other bare-bones frameworks, you will come to appreciate the ease of customisation and the structured/standardised coding approach that makes life easier for everyone.
Go ahead - make your news app available to the world, spread positivity and create more awesome apps.
The repository with full code is at https://github.com/prashanth1k/newsie-adonisjs-sample-app.