In this post we will see how to create a simple timesheet app using Vue and Vuetify. This is not quite a comprehensive tutorial on Vue or Vuetify, rather a demo of front-end features, see how easy it is to build an usable app, and in general, how modern app development makes the whole process enjoyable.
What are we building?
A simple timesheet app that will -
- enable to enter time on a day
- enable export of time data
We will store everything in browser storage and there will be no standard persistence layer. This app may or may not plugin to backend (Firebase? ExpressJS / Fastify? Hasura? Other?) in the future - comment and let me know if you’re interested in seeing that!
Technically, we will focus on -
- Use Vuex and router (latter is not quite needed, you will see more of this)
- Form validations
- Make application a joy to use with keyboard shortcuts
This is how it looks..
Go to https://simple-timesheet.techformist.com to see how the application works.
Get started with Vue
If you don’t have Vue CLI, this is a good time to go ahead and install it. Vue CLI is the starting point for all great Vue projects.
npm install -g @vue/cli
Create the project -
vue create simple-timesheet
Select the Vue version 2 for the sake of this project and instruct wizard that you will Manually select features. Also, select the below features/options -
- Options: Babel, PWA Support (optional), Router, Vuex, Linter / Formatter
Use history modeto ‘Y’ (default)- A sensible option for ESLint - I recommend
ESLint + Prettier - Store configuration in dedicated configuration files
Sit back while Vue CLI downloads packages and creates the project.
Once done, add Vuetify to the project.
cd simple-timesheet
vue add vuetify
Choose the default Vuetify configuration.
Add packages to our app - we will see their role in subsequent sections.
npm i --save vuex-persist vue-shortkey
Your project is ready to roll. Open the project folder in VS Code, the greatest editor of our times to get started.
Wire Everything Up
Vue comes packaged with all the things you need - so, there’s no complex wiring involved. Let us focus on getting everything to a baseline version to start creating magic.
Change the default App.vue.
<template>
  <v-app>
    <v-app-bar app color="primary darken-2" dark>
      <h3>Simple Timesheet</h3>
      <v-spacer></v-spacer>
      <v-btn text to="/daily">Daily</v-btn>
      <v-btn text to="/about">About</v-btn>
    </v-app-bar>

    <v-main>
      <v-card color="grey lighten-5" height="100%">
        <v-container>
          <router-view></router-view>
        </v-container>
      </v-card>
    </v-main>
  </v-app>
</template>

<script>
  export default {
    name: "App",

    components: {},

    data: () => ({
      //
    }),
  };
</script>
All we have done here is to change the toolbar, denote where our router will render views (router-view - no surprise there), and wrap the entire thing in a v-container to provide some nice spacing on all sides.
Follow up with a few more changes at the project level -
- Delete
component/HelloWorld.vuecomponent - we will create our own components. RemoveHelloWorldreferences fromApp.vueandHome.vueview. - Delete
views/Home.vueand remove references toHomefromrouter/index.js. - Change
About.vuepage - include whatever content you want. - Create a new view called
views/Daily.vue- let them be blank for now - Change
router/index.jsto add references to the new view. Let us redirect “/” to “/daily” and “/daily” will point to the “Daily” view.// ... other code const routes = [ { path: "/daily", name: "Daily", component: () => import("../views/Daily.vue"), }, { path: "/weekly", name: "Weekly", component: () => import("../views/Weekly.vue"), }, { path: "/about", name: "About", component: () => import(/* webpackChunkName: "about" */ "../views/About.vue"), }, ]; // ... other code
Next, configure any additional packages.
Package 1: vuex-persist
vuex-persist enables storing of vuex values to browser local storage. This is quite handy since we don’t want to lose values entered by the user whenever the page is refreshed, or when the website is closed.
Make below changes in store/index.js -
Pull
vuex-persistmoduleimport VuexPersistence from "vuex-persist"; const vuexLocal = new VuexPersistence({ storage: window.localStorage, });Include as a plugin
export default new Vuex.Store({
  state: {},
  mutations: {},
  actions: {},
  modules: {},
  plugins: [vuexLocal.plugin],
});
Package 2: vue-shortkey
Change main.js. Just after the line Vue.config.productionTip = false; add another line..
Vue.use(require("vue-shortkey"));
This will reference the package we added earlier vue-shortkey, which will enable us to tie keyboard shortcuts to specific actions (e.g. create new record can be tied to Ctrl + N).
Additional Configuration
Add a single line to public/index.html.
<link rel="stylesheet" href="https://unpkg.com/microtip/microtip.css" />
This will enable us to use a small, light-weight package called microtip to show tooltips on any UI element. See creating simple tooltips in Vue for more details.
Start your project
It’s time to start up stuff and see if everything’s working.
npm run serve
You should see your Vue application start up, and automatically open the browser with your application at http://localhost:8080.
Note that -
- We have not added any functionality yet - will get to that in the next section
- UI elements like icons, iamges and fonts were not changed
- We did not quite need a router. We could have as well used a tab component in Vuetify and be no wiser. While that keeps things simpler, router is invaluable if you start adding other views and need navigation elements for those views
- It’s possible to configure vuex-persist to your heart’s content, but we are sticking to keeping things simple
Create Supporting Components
Let’s go ahead and create a couple of reusable components that will be used by other components.
Date Pick Component
Vuetify makes creating a field with a date pick quite easy. We can create a text box and enable a date picker using v-date-picker.
But, we don’t want to use boilerplate code each time we need to create a date field. Let us create a DatePick component that can be used by other components or views for any date fields.
Create a new file components/DatePick.vue. Add following code -
<template>
  <!-- Todo: This needs cleaning up - either incl. date format or remove them -->
  <v-menu
    ref="menu"
    v-model="menu"
    :close-on-content-click="false"
    transition="scale-transition"
    offset-y
    :nudge-right="40"
    scrollable
    max-width="290px"
    min-width="290px"
  >
    <template v-slot:activator="{ on }">
      <v-text-field
        :value="dateDisplay"
        outlined
        :label="label"
        append-icon="mdi-calendar"
        readonly
        :dense="dense"
        :hide-details="hideDetails"
        :disabled="disabled"
        @click:append="menu = true"
        v-on="on"
      ></v-text-field>
    </template>
    <v-date-picker
      v-model="dateValue"
      no-title
      scrollable
      :min="min"
      :max="max"
      @input="menu = false"
    ></v-date-picker>
  </v-menu>
</template>

<script>
  export default {
    props: {
      label: { type: String, default: "" },
      appendIcon: { type: String, default: "mdi-calendar" },
      field: { type: String, default: "" },
      dense: { type: Boolean, default: false },
      hideDetails: { type: Boolean, default: false },
      disabled: { type: Boolean, default: false },
      min: {
        type: String,
        default: () => {
          const dt = new Date();
          dt.setDate(dt.getDate() - 30);
          return dt.toISOString().substring(0, 10);
        },
      },
      max: {
        type: String,
        default: () => {
          const dt = new Date();
          dt.setDate(dt.getDate() + 365);
          return dt.toISOString().substring(0, 10);
        },
      },
    },
    data() {
      return {
        menu: false,
        modal: false,
        menu2: false,
        localField: "",
        dateValue: "",
      };
    },
    computed: {
      dateDisplay: {
        get() {
          return this.dateValue;
        },
        set(val) {
          this.$emit("update:field", val);
        },
      },
      localFieldFmt: {
        get() {
          return this.formatDate(this.localField);
        },
        set(val) {
          this.$emit("update:field", val);
        },
      },
    },
    watch: {
      localFieldFmt(val) {
        this.$emit("update:field", val);
      },
      dateValue(val) {
        this.$emit("update:field", val);
      },
    },
    mounted() {
      this.dateValue = this.field;
      // this.localField = this.parseDate(this.field);
    },
    methods: {
      test() {
        console.log("wow");
      },
      formatDate(date) {
        if (!date) return null;

        const [year, month, day] = date.split("-");
        //   return `${day}/${month}/${year}`;
        return `${year}-${month}-${day}`;
      },

      parseDate(date) {
        if (!date) return null;

        const [day, month, year] = date.split("-");
        return `${year}-${month.padStart(2, "0")}-${day.padStart(2, "0")}`;
      },

      setLocalFieldFmt(val) {
        this.localFieldFmt = val;
        this.localField = val ? this.parseDate(val) : null;
      },
    },
  };
</script>
Don’t quite worry if you don’t get what’s going on here. We are doing a couple of things -
- Create a text field input box that can take in user inputs
- Enable date control using
v-date-picker - Raise an event whenever the date is set so that the calling component can set a value based on user input
- We can also parse date values to handle international dates, but we will not quite use that here
We can now use this component in any other view or component like so -
<DatePick
  name="todayDate"
  :field="dayDate"
  @update:field="setDayDate($event)"
  :dense="true"
></DatePick>
Here -
dayDateis a field (can be from Vuex or at the component level - we will see how this is used shortly)- On
update:fieldevent (which corresponds to the date input by user) we call a method calledsetDayDate
See reusable date picker field for Vuetify for more details about the date picker field.
Confirm component
It is a common UI experience to ask for confirmation before allowing specific user actions - especially if they are irreversible. Vuetify has a v-dialog component to show a popup to that purpose, but it would need some boilerplate code to enable it each time to ask a question. Let’s create a Confirm component to make it easier.
Create a new file components/Confirm.vue.
<template>
  <v-dialog
    v-model="dialog"
    :max-width="options.width"
    :style="{ zIndex: options.zIndex }"
    @keydown.esc="cancel"
  >
    <v-card>
      <v-toolbar dark :color="options.color" dense flat>
        <v-toolbar-title class="text-body-2 font-weight-bold grey--text">
          {{ title }}
        </v-toolbar-title>
      </v-toolbar>
      <v-card-text
        v-show="!!message"
        class="pa-4 black--text"
        v-html="message"
      ></v-card-text>
      <v-card-actions class="pt-3">
        <v-spacer></v-spacer>
        <v-btn
          v-if="!options.noconfirm"
          color="grey"
          text
          class="body-2 font-weight-bold"
          @click.native="cancel"
          >Cancel</v-btn
        >
        <v-btn
          color="primary"
          class="body-2 font-weight-bold"
          outlined
          @click.native="agree"
          >OK</v-btn
        >
      </v-card-actions>
    </v-card>
  </v-dialog>
</template>

<script>
  export default {
    name: "Confirm",
    data() {
      return {
        dialog: false,
        resolve: null,
        reject: null,
        message: null,
        title: null,
        options: {
          color: "grey lighten-3",
          width: 400,
          zIndex: 200,
          noconfirm: false,
        },
      };
    },

    methods: {
      open(title, message, options) {
        this.dialog = true;
        this.title = title;
        this.message = message;
        this.options = Object.assign(this.options, options);
        return new Promise((resolve, reject) => {
          this.resolve = resolve;
          this.reject = reject;
        });
      },
      agree() {
        this.resolve(true);
        this.dialog = false;
      },
      cancel() {
        this.resolve(false);
        this.dialog = false;
      },
    },
  };
</script>
In the above code -
- we show a message popup using
v-dialog. The message is passed to the component using props - we pass along the user action (
yesornofor example) so that the caller can take action based on the answer
We use the Confirm component in two parts.
First, create a reference to
Confirmin<template>.<template> <!-- other code --> <confirm ref="confirm" /> <!-- other code --> </template>Import the component.
<script>
  // other code
  export default {
    components: {
      Confirm: () => import("../components/Confirm"),
    },
    // other code
  };
</script>
Call the confirm dialog whenever needed
<script>
  // other code
  export default {
    methods: {
      async deleteRecordWithConfirm() {
        if (
          await this.$refs.confirm.open(
            "Confirm Delete",
            "Are you sure you want to delete this record?"
          )
        )
          this.deleteRecord();
      },
    },

    // other code
  };
</script>
Again, don’t worry too much into how confirm works - you will get time to see much more later.
Now that everything’s wired up and we created baseline infrastructure, it is time to write our core functionality.
Create Daily Component
We already created a view called Daily.vue. We will add a simple form and some code to enable users to create/edit/view timesheet entries.
Add the below code -
<template>
  <div align="center">
    <v-card color="white" width="70%">
      <v-toolbar color="grey lighten-3" flat>
        <span class="font-weight-black h6">Daily Timesheet</span>
        <v-spacer></v-spacer>
        <v-btn
          small
          class="mr-2"
          @click="resetAfterConfirm"
          aria-label="Reset timesheet. Delete all entries below."
          data-microtip-position="bottom"
          role="tooltip"
        >
          <v-icon small dark>mdi-delete-sweep</v-icon> Reset
        </v-btn>
        <v-menu offset-y close-on-content-click>
          <template v-slot:activator="{ on, attrs }">
            <v-btn
              small
              class="mr-2"
              aria-label="Download timesheet."
              data-microtip-position="bottom"
              role="tooltip"
              v-bind="attrs"
              v-on="on"
            >
              <v-icon small dark>mdi-download</v-icon>
              Export
            </v-btn>
          </template>
          <v-list>
            <v-list-item
              v-for="(item, index) in downloadItems"
              :key="index"
              @click="invokeAction(item.action)"
            >
              <v-list-item-title>{{ item.title }}</v-list-item-title>
            </v-list-item>
          </v-list>
        </v-menu>
        <v-btn
          color="primary"
          small
          class="mr-2"
          @click="newDayTime"
          v-shortkey="['alt', 'shift', 'n']"
          @shortkey="newDayTime()"
          aria-label="Create new time. [alt+shift+n]"
          data-microtip-position="bottom"
          role="tooltip"
        >
          <v-icon small dark>mdi-plus</v-icon>Add
        </v-btn>
      </v-toolbar>
      <v-container>
        <div align="left" class="pl-3 pr-3">
          <label for="todayDate" class="font-weight-bold grey--text">
            Date
          </label>
          <DatePick
            name="todayDate"
            :field="dayDate"
            @update:field="setDayDate($event)"
            :dense="true"
          ></DatePick>
          <div class="text-h6" align="left">
            Total Hours:
            <span class="font-weight-bold" color="primary">
              {{ totalTime }}
            </span>
          </div>
        </div>
        <v-card
          flat
          color="transparent"
          height="400px"
          class="pl-3"
          style="overflow-y:auto; overflow-x:hidden"
        >
          <v-form @submit.prevent="addEntry">
            <v-row align="center" dense>
              <v-col cols="12" sm="10" align="left"> </v-col>
              <v-col
                cols="12"
                v-for="(dayTime, index) in dayTimes"
                :key="index"
              >
                <v-row dense>
                  <v-col cols="12" sm="8">
                    <v-text-field
                      placeholder="What work is this for?"
                      v-model="dayTime['desc']"
                      dense
                      outlined
                      autofocus
                      @focus="activeIndex = index"
                      hide-details
                    ></v-text-field>
                  </v-col>
                  <v-col cols="10" sm="2">
                    <v-text-field
                      dense
                      placeholder="Hours"
                      v-model="dayTime['time']"
                      outlined
                      type="number"
                      reverse
                      @focus="activeIndex = index"
                      hide-details
                    ></v-text-field>
                  </v-col>
                  <v-col cols="2" align="left">
                    <v-btn
                      fab
                      icon
                      small
                      @click="delDayTimeByIndex(activeIndex)"
                      v-shortkey="['alt', 'shift', 'del']"
                      @shortkey="delDayTimeByIndex(activeIndex)"
                      aria-label="Delete this entry. [alt+shift+del]"
                      data-microtip-position="bottom"
                      data-microtip-size="medium"
                      role="tooltip"
                    >
                      <v-icon color="grey">mdi-delete</v-icon>
                    </v-btn>
                  </v-col>
                </v-row>
              </v-col>
            </v-row>
          </v-form>
        </v-card>
      </v-container>
    </v-card>
    <confirm ref="confirm" />
  </div>
</template>

<script>
  import { mapState, mapMutations } from "vuex";

  export default {
    name: "Daily",
    components: {
      DatePick: () => import("../components/DatePick"),
      Confirm: () => import("../components/Confirm"),
    },
    data() {
      return {
        activeIndex: 0,
        downloadItems: [
          { title: "CSV", action: "generateDownloadCsv" },
          { title: "TXT", action: "generateDownloadTxt" },
        ],
      };
    },
    computed: {
      ...mapState("daystr", ["dayTimes", "dayDate"]),

      totalTime() {
        return this.dayTimes.reduce(
          (sum, element) => sum + (Number(element["time"]) || 0),
          0
        );
      },
    },
    mounted() {
      if (this.dayTimes.length == 0) this.resetDay();
    },
    methods: {
      ...mapMutations("daystr", [
        "newDayTime",
        "setActiveDayTime",
        "setDayDate",
        "resetDay",
        "delDayTimeByIndex",
      ]),
      async resetAfterConfirm() {
        if (
          await this.$refs.confirm.open(
            "Confirm Reset",
            "Are you sure you want to reset timesheet? You will lose all data on this page."
          )
        )
          this.resetDay();
      },
      invokeAction(action) {
        this[action]();
      },
      generateDownloadCsv() {
        this.generateExportAndDownload("data:text/csv", "csv", ",");
      },
      generateDownloadTxt() {
        this.generateExportAndDownload("data:text/txt", "txt", " - ");
      },
      generateExportAndDownload(filetype, extn, separator) {
        let strDayTimes = `${filetype};charset=utf-8,Timesheet for Date: ${this.dayDate} \n\rTotal Time: ${this.totalTime} hours \n\rTime Records\n===============================\n`;
        strDayTimes += `Description${separator}Time (Hours)\n===============================\n`;
        strDayTimes += this.dayTimes
          .map((element) => `${element["desc"]}${separator}${element["time"]}`)
          .join("\n")
          .replace(/(^\[)|(\]$)/gm, "");

        const fileData = encodeURI(strDayTimes);
        const link = document.createElement("a");
        link.setAttribute("href", fileData);
        link.setAttribute("download", `timesheet.${extn}`);
        link.click();
      },
    },
  };
</script>
There are quite a few things going on here. Let us dissect them in detail.
Start up
mounted() method in a Vue component helps us to “hook” into the component start up and run some code each time the component gets displayed.
We are including the following code in mounted.
if (this.dayTimes.length == 0) this.resetDay();
This will call a method resetDay only if dayTimes array does not have any elements. resetDay is outlined in the Vuex store. It will -
- Reset the date to today’s date
- Delete all entries in the timesheet
UI Elements
Everything within <template> tags form our UI. Here we use Vuetify grid, ready-made components from Vuetify like button, text input box, and more to create our timesheet.
Toolbar
Toolbar consists of a couple of buttons and a menu item to show export options.
<v-toolbar color="grey lighten-3" flat>
  <span class="font-weight-black h6">Daily Timesheet</span>
  <v-spacer></v-spacer>
  <v-btn
    small
    class="mr-2"
    @click="resetAfterConfirm"
    aria-label="Reset timesheet. Delete all entries below."
    data-microtip-position="bottom"
    role="tooltip"
  >
    <v-icon small dark>mdi-delete-sweep</v-icon> Reset
  </v-btn>
  <v-menu offset-y close-on-content-click>
    <template v-slot:activator="{ on, attrs }">
      <v-btn
        small
        class="mr-2"
        aria-label="Download timesheet."
        data-microtip-position="bottom"
        role="tooltip"
        v-bind="attrs"
        v-on="on"
      >
        <v-icon small dark>mdi-download</v-icon>
        Export
      </v-btn>
    </template>
    <v-list>
      <v-list-item
        v-for="(item, index) in downloadItems"
        :key="index"
        @click="invokeAction(item.action)"
      >
        <v-list-item-title>{{ item.title }}</v-list-item-title>
      </v-list-item>
    </v-list>
  </v-menu>
  <v-btn
    color="primary"
    small
    class="mr-2"
    @click="newDayTime"
    v-shortkey="['alt', 'shift', 'n']"
    @shortkey="newDayTime()"
    aria-label="Create new time. [alt+shift+n]"
    data-microtip-position="bottom"
    role="tooltip"
  >
    <v-icon small dark>mdi-plus</v-icon>Add
  </v-btn>
</v-toolbar>
You may note that -
v-menupulls in the list of menu items using a<v-list>from a variable calleddownloadItems. This variable is specific to this Vue component and is defined indatasection- we used
microtiprequired parameters likearia-label,data-microtip-positionandroleto create tooltips on button - we called methods defined in the
scriptsection using the magical@clickevent from buttons (v-btn) - buttons use
v-shortkeyto denote the shortcut key combination to simulate button click and@shotcutkeyto denote which method should be called on click
Header
Create -
- a date field that the user can update. Use the
DatePickcomponent created earlier - a field that shows the total time entered. Use
totalTimecomputed variable - details on the computed variable in thecomputedsection
<DatePick
  name="todayDate"
  :field="dayDate"
  @update:field="setDayDate($event)"
  :dense="true"
></DatePick>
<div class="text-h6" align="left">
  Total Hours:
  <span class="font-weight-bold" color="primary"> {{ totalTime }} </span>
</div>
Timesheet entries
Show the list of timesheet entries recorded in dayTimes array with the below code block -
<v-col cols="12" v-for="(dayTime, index) in dayTimes" :key="index">
  <v-row dense>
    <v-col cols="12" sm="8">
      <v-text-field
        placeholder="What work is this for?"
        v-model="dayTime['desc']"
        dense
        outlined
        autofocus
        @focus="activeIndex = index"
        hide-details
      ></v-text-field>
    </v-col>
    <v-col cols="10" sm="2">
      <v-text-field
        dense
        placeholder="Hours"
        v-model="dayTime['time']"
        outlined
        type="number"
        reverse
        @focus="activeIndex = index"
        hide-details
      ></v-text-field>
    </v-col>
    <v-col cols="2" align="left">
      <v-btn
        fab
        icon
        small
        @click="delDayTimeByIndex(activeIndex)"
        v-shortkey="['alt', 'shift', 'del']"
        @shortkey="delDayTimeByIndex(activeIndex)"
        aria-label="Delete this entry. [alt+shift+del]"
        data-microtip-position="bottom"
        data-microtip-size="medium"
        role="tooltip"
      >
        <v-icon color="grey">mdi-delete</v-icon>
      </v-btn>
    </v-col>
  </v-row>
</v-col>
Computed variables
Computed variables allow us to use calculated values, values that dymamically change at different stages of the component based on component state, data variables, external data, user actions and so on.
We created two different types of variables here -
- Pull in the Vuex state variables from
daystrmodule with...mapState("daystr", ["dayTimes", "dayDate"]) - Create a
totalTimevalue that will add up all time entries and provide the total time entered on the timesheet. There are multiple ways of doing this including a simpleforstatement to loop through thedayTimesarray, but we have used some shortcut methods to keep the code clean 😜
The overall computed code block is below -
computed: {
  ...mapState("daystr", ["dayTimes", "dayDate"]),

  totalTime() {
    return this.dayTimes.reduce(
      (sum, element) => sum + (Number(element["time"]) || 0),
      0
    );
  },
},
Methods
Most of the methods are mutations defined in the Vuex module dailystr. These are referenced in our component with the following line -
export default {
  methods: {
    ...mapMutations("daystr", [
      "newDayTime",
      "setActiveDayTime",
      "setDayDate",
      "resetDay",
      "delDayTimeByIndex",
    ]),
  },
};
Beyond Vuex, we have a few more methods -
Method 1: InvokeAction
This method simply calls another method. It is used in a list so that we can call methods dynamically while we are defining the list.
invokeAction(action) {
    this[action]();
},
Method 2: Confirm and reset timesheet
This method gets invoked when user clicks on “Reset” button. Ask user to confirm reset and call a Vuex mutation that will reset the dayTimes array and reset date to today’s date.
async resetAfterConfirm() {
  if (
    await this.$refs.confirm.open(
      "Confirm Reset",
      "Are you sure you want to reset timesheet? You will lose all data on this page."
    )
  )
    this.resetDay();
},
Methods 3 & 4: generateDownLoad methods
We invoke two distinct methods when user clicks on export button - one of them facilitates export to CSV file format, while the other option enables a text export.
generateDownloadCsv() {
  this.generateExportAndDownload("data:text/csv", "csv", ",");
},
generateDownloadTxt() {
  this.generateExportAndDownload("data:text/txt", "txt", " - ");
},
Both these methods call generateExportAndDownload, which will export the timesheet entries to a file based on input arguments. We could have called generateExportAndDownload method directly from the template HTML with arguments, but we used different methods for any future scalability. (yes, this is sarcasm)
Method 5: generateExportAndDownload method
generateExportAndDownload will -
- take three arguments for the export file type, the extension to be used for the export file and the separator to be used between the timesheet description and number of hours
- fetch the entries from the Vuex store variables (the “state” values)
dayDateanddayTimes - create a string for export by joining some informational statements and the
dayTimesarray - create an
atag with the content as newly created string - simulate a click on the
alink to download content to a file
generateExportAndDownload(filetype, extn, separator) {
  let strDayTimes = `${filetype};charset=utf-8,Timesheet for Date: ${this.dayDate} \n\rTotal Time: ${this.totalTime} hours \n\rTime Records\n===============================\n`;
  strDayTimes += `Description${separator}Time (Hours)\n===============================\n`;
  strDayTimes += this.dayTimes
    .map(element => `${element["desc"]}${separator}${element["time"]}`)
    .join("\n")
    .replace(/(^\[)|(\]$)/gm, "");

  const fileData = encodeURI(strDayTimes);
  const link = document.createElement("a");
  link.setAttribute("href", fileData);
  link.setAttribute("download", `timesheet.${extn}`);
  link.click();
},
Modify Vuex store
The Daily timesheet component references Vuex store and specifically a module called dailystr. Let us include that.
Create a new file called store/dailystr.js.
export default {
  namespaced: true,
  name: "daystr",
  state: {
    dayDate: "",
    dayTimes: [],
    activeDayTime: {},
  },
  mutations: {
    newDayTime(state) {
      state.dayTimes.push({ desc: "", time: 1 });
    },

    setActiveDayTime(state, val) {
      state.activeDayTime = val;
    },

    delDayTimeByIndex(state, index) {
      state.dayTimes.splice(index, 1);
    },

    setDayDate(state, val) {
      state.dayDate = val;
    },

    resetDay(state) {
      state.dayDate = new Date().toISOString().substr(0, 10);
      state.dayTimes = [{ desc: "", time: 1 }];
    },
  },
};
We create a bunch of variables to store time entries in a day, and also created mutations that allow us to change those variable values.
Change store/index.js to include the newly created module. The complete code is outlined below.
import Vue from "vue";
import Vuex from "vuex";

import VuexPersistence from "vuex-persist";

import daystr from "./daystr";

Vue.use(Vuex);

const vuexLocal = new VuexPersistence({
  storage: window.localStorage,
});

export default new Vuex.Store({
  state: {},
  mutations: {},
  actions: {},
  modules: { daystr },
  plugins: [vuexLocal.plugin],
});
We had made the vuex-persist related changes at the beginning of this post.
Enable PWA
If you had selected the PWA option while creating the project using Vue CLI, your app is automatically available as a progressive web app. You cannot test this unless you are connected using https. Since we don’t really do any changes here, you can see the PWA in action after deploying the application.
Deploy
Deploying a client-application is really easy - thanks to build/deploy/host application services available today.
As an example, we will use vercel.com.
Go to vercel.com, create an account if you don’t have one, or login to your existing account.
On dashboard, click on Import Project button. Vercel will ask you for the Git repository to import and may also ask you for additional permissions to access repository.
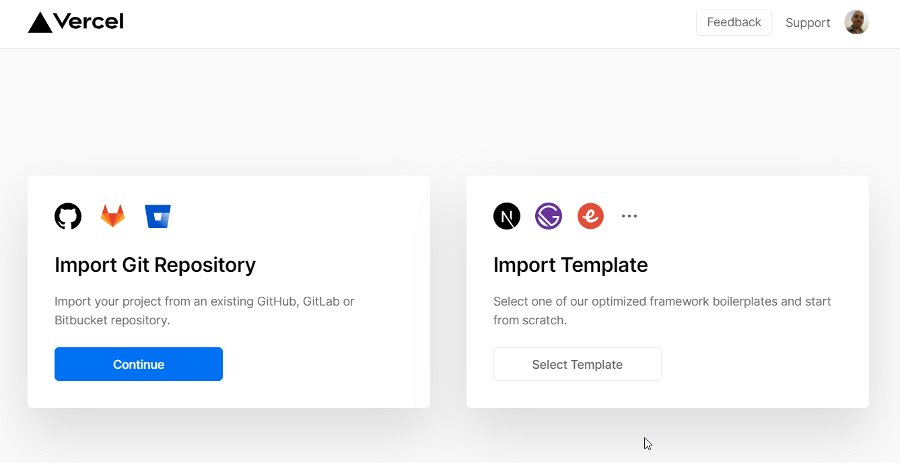
Once the repo is imported, Vercel should automatically identify the project as a Vue app and set build configuration. Review the configuration and click on Deploy to deploy your app and make it available to the world. Vercel will provide the URL that you can use to access your app.
The URL for your app will be available over https (e.g. simple-timesheet.vercel.app). You will be able to install this app to your desktop or mobile using the functionality enabled by PWA.
Finis
That’s it - you have created and deployed a totally real-world timesheet application usign Vue, Vuetify and friends.
The repository with full code is at https://github.com/prashanth1k/simple-timesheet.