Express is like a dear friend who does not leave your side during happy or sad times in your life. She may not help you reach enlightenment, but she’s there and she’s super supportive. And, that’s all you need many a time.
In this post we create a blog with ExpressJS and friends - oh how exciting. Our blog is going to look beautiful with -
- ExpressJS (of course)
- Ejs for templating. Has SSR built-in - for you SPA crazies
- Supports content authoring in markdown
Here’s how it looks -
Why ExpressJS?
First, I am kind of sad that this question came up - I mean, re-read [paragraph 1]. But since you asked - I continue to chose ExpressJS because-
- It is so darn easy to start and continue rocking
- Large community = lot of solved problems
- A tonne of useful code, plugins, middleware and so on
I am more firmly in the SPA camp nowadays and love the productivity of a Vue application + standard styling libraries. But hey, Express and server-side templating keeps things real simple.
Get Started: Setup
Install Node and VSCode if you don’t already have them.
Create a new folder in some corner of your computer, name it bloggie, and open VSCode in that folder.
Open a terminal (in Windows, Mac or in VSCode - I don’t judge), ensure that you are in the project folder, and key in the command to initiate the project.
npm init -y
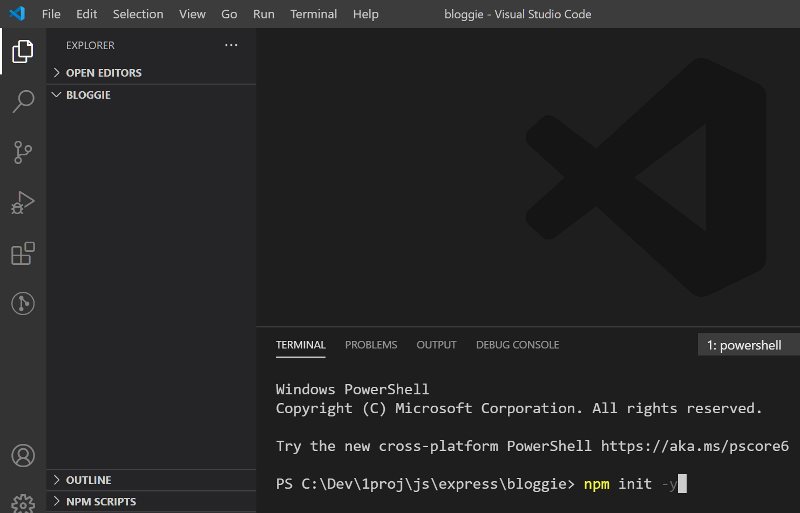
It’s time for that pat on your back - 25% of the work is already done.
Install a few packages that will be used in the project. We will see their purpose in a bit.
npm i --save express ejs pg knex dotenv
Here’s how the packages will be used..
express: App serverejs: Templating language that allows us to specify variables in standard HTMLpg: Connect and run queries on postgres DBdotenv: Get variables from an environment file
Install dev dependencies, which are packages used to get stuff done during development, but are not needed in production.
npm i --save-dev nodemon knex
Here we have -
nodemon: automatically restarts server when files are changesknex: Query builder that makes writing dynamic queries a wee bit easier
You can install knex globally with npm i -g knex if you are going to use knex commands every now and then. The advantage of using global knex is that you don’t need to explicitly reference knex within node_modules. Either ways, it is a good idea to include knex as an explicit dependency to also let others know of its gracious presence.
Create a folder in the project root folder and call it public. This folder will host all the assets exposed to the internet - like css, images, etc.
Next, install Postgres database server. The easiest way to do it is to download Laragon, and click on a few buttons to install Postgres database.
We now have everything to get started.
Getting Started: First Steps
Create a new file in the project folder called app.js.
const express = require("express");
const app = express();

// setup
require("dotenv").config();
app.set("view engine", "ejs");
app.use(express.static("public"));
app.use(express.urlencoded({ extended: false }));

app.listen(9000, () => console.log("App listening on port 9000."));
With a few lines of code we created an Express server.
require("dotenv").config()allows us to define and use environment variablesapp.set("view engine", "ejs")lets useejstemplating engine, which is a way to introduce variables within HTMLapp.use(express.static("public"));enables us to store static assets inpublicfolder and use that in our appapp.use(express.urlencoded({ extended: false }))will allow us to use parameters in the URL - we will see more of this
Include a command in your package.json to run your app.
{
  "name": "bloggie",
  "version": "1.0.0",
  "description": "",
  "main": "app.js",
  "scripts": {
    "dev": "nodemon app.js"
  }
  // other lines
}
You can now start your express app with the command -
npm run dev
See the line App listening on port 9000. and rejoice. Try making any changes to a file and see the server automatically restart - ah, the joy of modern programming.
Create Database
Any modern web app has several layers to it. We typically -
- design “top-down”: think about how your app flows, how screens are used and drill-down to specifics - where the business logic is implemented and data gets stored
- develop “bottom-up”: start assembling blocks from the bottom layer and build out
So, let’s start creating them tables. knex makes it a breeze.
Get started by creating the knex init file - knexfile.js. You can do that by entering the below command..
npx knex init
.. or reference knex using the full path relative to your project root folder.
node_modules/.bin/knex init
If you have installed knex globally, you could simply use knex like any other DOS command in the terminal.
knex init
Change knexfile.js file to specify our database and connection settings -
// Update with your config settings.

module.exports = {
  development: {
    client: "postgresql",

    connection: {
      database: "bloggie",
      user: "postgres",
      password: "",
    },
    pool: {
      min: 2,
      max: 10,
    },
    migrations: {
      tableName: "knex_migrations",
      directory: "data/migrations",
    },
  },
};
The configuration is fairly straight forward -
- Specify a database and user id/ password to connect
- Specify a pool. A pool persists connections even after a transaction is completed and allows the next transaction to reuse connection. This saves execution time
- We also specify the name of the table that stores the migration history -
knex_migrations, and the directory where table definitions and seed data is stored -data/migrations
Create data and migrations directories.
mkdir data
mkdir data/migrations
Create your first migration file called <wierd_number>_init.js. A migration file allows you to simplify creating tables and also version controlling table changes made at different times.
knex migrate:make init
Change the file to include table definitions. We will create a table to store blog posts and call it posts.
exports.up = function (knex) {
  return knex.schema.createTable("posts", function (table) {
    table.increments();
    table.timestamp("created_at").defaultTo(knex.fn.now());
    table.timestamp("updated_at").defaultTo(knex.fn.now());

    table.string("title").notNullable();
    table.text("content").notNullable();
    table.string("slug", 100).unique();
    table.string("tags", 100);
  });
};

exports.down = function (knex, Promise) {
  return knex.schema.dropTable("posts");
};
Next, let us apply this migration to the database.
knex migrate:up
If everything goes well we will see table posts created in the database. You can verify it by connecting to your Postgres DB using database client programs like pgadmin4 (typically installed with Postgres in dev environment) or HeidiSQL.
Before we go any further, create a file to facilitate easy import of knex libraries in our project - data/db.js.
const environment = process.env.NODE_ENV || "development";
var config = require("../knexfile.js")[environment];

module.exports = require("knex")(config);
You can test the connection by adding following lines in app.js.
const db = require("./data/db");
const posts = await db("posts");
console.log("posts: ", posts);
This should output an empty array since the table does not have any rows yet. You can delete the above lines once testing is complete - we don’t quite need them.
Routes in Express
Remember that Express server is running on port 9000? Go to a browser and enter http://localhost:9000 to see a blank page. Real-world web applications do magic with these URLs - you could have -
http://localhost:9000/blog: to show posts from your bloghttp://localhost:9000/users: to display all users of your app
Of course you have to build functionality in your server to provide information back to user when she enters the URL. These URLs are what are called routes for your app. ExpressJS can identify routes and you can enter your own functions to call for specific routes.
Just add following lines to app.js to create a new route -
const router = express.Router();
router.get("/hello", async (req, res) => {
  res.send("hello world");
});
Save the file and go to http://localhost:9000/hello in your browser to see hello world message.
An app can have many routes and it is going to make our app.js look bad. Let’s put these routes in a different file. Create a new folder called routes in project root and create a file therein called index.js. Fill this file with the same code -
const express = require("express");
const router = express.Router();
router.get("/hello", async (req, res) => {
  res.send("hello world");
});
module.exports = router;
Import this file in app.js..
const express = require("express");
const app = express();

// setup
require("dotenv").config();
app.use(express.static("public"));
app.use(express.urlencoded({ extended: false }));

const router = require("./routes/index");
app.use("/", router);

app.listen(9000, () => console.log("App listening on port 9000."));
While rest of the lines remain the same as earlier, app.use("/", router); will signify that the new route will be available at /. If you had typed /blog instead, we could have specified routes only applicable to a blog. For e.g. /blog/post-1, /blog, /blog/post-2, etc.
Routes by themselves can execute some code and send the response back to the caller. But, that’s no joy - we need to display information in a structured manner on a page. Enter views.
Views in Express
Views can be simple HTML pages that display any information. In our example we use a templating language (ejs) to create HTML and include variables in the HTML. These variables are substituted at runtime by values from database, disk or from external API calls.
To use ejs we need to tell Express that. Change app.js -
const express = require("express");
const app = express();

// setup
require("dotenv").config();
app.set("view engine", "ejs");
app.use(express.static("public"));
app.use(express.urlencoded({ extended: false }));

const router = require("./routes/index");
app.use("/", router);

app.listen(9000, () => console.log("App listening on port 9000."));
Create a new view hello.ejs in <project_root>/views/ folder. Add below code -
<html>
  <h1>hello world</h1>
</html>
Change the hello route in routes/index.js to -
const express = require("express");
const router = express.Router();
router.get("/hello", async (req, res) => {
  res.render("hello");
});
module.exports = router;
Visit http://localhost:9000/hello to see the hello world message.
So far you have seen how routes work, how to interact with database, and how to create views and display information. These are the only building blocks we need - let’s put them together for our blog.
Understand routes for a Blog
What exactly can you do with a blog?
- Display posts
- View a specific post
- Write a post
- Update a post
- Delete a post
Each of these actions will have a specific route in Express. Let’s start with displaying a list of posts.
const express = require("express");
const router = express.Router();

const db = require("../data/db");

const slugify = require("slugify");
const marked = require("marked");
const domPurify = require("dompurify");
const { JSDOM } = require("jsdom");
const purify = domPurify(new JSDOM().window);

router.get("/", async (req, res) => {
  // const results = await db.query("select * from posts");

  // res.send({ rows: results.rows });
  res.render("index");
});

router.get("/blog", async (req, res) => {
  const posts = await db.from("posts").orderBy("created_at", "desc");
  res.render("blog/index", { posts: posts });
});

module.exports = router;
We are pointing two routes / (http://localhost:9000) and /blog (http://localhost:9000/blog) to two views index and blog/index respectively.
Let us add the two views.
Create a new view views/index.ejs, which will serve as the home page for the app.
<html>
  <head>
    Head section this is
  </head>

  <body>
    <nav>
      <a>Link 1</a>
      <a>Link 2</a>
    </nav>

    <div class="container">
      <section>
        <h2 style="font-weight:800">Welcome to Bloggie</h2>
      </section>
      <div class="post-meta">'tis where magic happens.</div>
      <a href="/blog"><button>Go to Blog!</button></a>
    </div>
    <footer>(c) Bloggie Blog.</footer>
  </body>
</html>
Create a new view views/blog/index.ejs to display a list of posts.
<html>
  <head>
    Head section this is
  </head>

  <body>
    <nav>
      <a>Link 1</a>
      <a>Link 2</a>
    </nav>

    <div class="container">
      <section>
        <h2 style="font-weight:800">List of Posts</h2>
      </section>
      <div>Post 1</div>
      <div>Post 2</div>
      <div>Post 3</div>
    </div>
    <footer>(c) Bloggie Blog.</footer>
  </body>
</html>
You can now visit the URLs / and /blog to see these views. You may have observed that we have repeated information in sections like head, footer etc. ejs provides a good way to reuse sections by creating them in one place and including them in any other views as required.
We can easily do that for our views. First create a reusable “partial file” called views/partials/head.ejs.
<meta charset="UTF-8" />
<meta name="viewport" content="width=device-width, initial-scale=1.0" />
<title>My Super Blog</title>
Create a second partial for navigation views/partials/nav.ejs -
<header style="text-align: center">
  <h3 class="site-title">My Super Blog</h3>


  <nav>
    <a href="/">Home</a> | <a href="/blog">Blog</a> |
    <a href="https://github.com/prashanth1k/bloggie">GitHub</a>
  </nav>
</header>
Create another partial for footer views/partials/footer.ejs -
<hr />
<p style="text-align:center; color:grey; font-size: small;">
  © 2020-Infinity My Super Blog
</p>
We now include these partials in our views.
Our index.ejs will change to -
<html>
  <head>
    <%- include('./partials/head'); %>
  </head>

  <body>
    <%- include('./partials/nav'); %>

    <div class="container">
      <section>
        <h2 style="font-weight:800">Welcome to Bloggie</h2>
      </section>
      <div class="post-meta">'tis where magic happens.</div>
      <a href="/blog"><button>Go to Blog!</button></a>
    </div>
    <footer><%- include('./partials/footer'); %></footer>
  </body>
</html>
The <%- %> tags allow you to include variables, values and functions. Here we use include statement to include another ejs file “as is” - meaning, the target ejs file will be copied/pasted in the parent “in full” at runtime.
The blog list page blog/index.ejs will change to -
<html>
  <head>
    <%- include('./partials/head'); %>
  </head>

  <body>
    <%- include('./partials/nav'); %>

    <div class="container">
      <section>
        <h2 style="font-weight:800">List of Posts</h2>
      </section>
      <div>Post 1</div>
      <div>Post 2</div>
      <div>Post 3</div>
    </div>
    <footer><%- include('./partials/footer'); %></footer>
  </body>
</html>
The end result will be the same as earlier.
Since we are on the topic of views and views are about displaying information in a beautiful way - let us also include some styles.
Change views/partials/head.ejs to -
<meta charset="UTF-8" />
<meta name="viewport" content="width=device-width, initial-scale=1.0" />
<link
  rel="stylesheet"
  href="https://cdnjs.cloudflare.com/ajax/libs/milligram/1.4.1/milligram.css"
/>
<link rel="stylesheet" type="text/css" href="/css/styles.css" />
<link rel="preconnect" href="https://fonts.gstatic.com" />
<link
  href="https://fonts.googleapis.com/css2?family=Open+Sans:wght@400;800&display=swap"
  rel="stylesheet"
/>

<title>My Super Blog</title>
milligram.css is a nice, classless styling library. It allows you to style your apps without adding any (or many) styling classes and has sensible defaults for standard HTML elements. We will include additional styling for our app in a new file called /css/styles.css. Check out the Github repo for contents of styles.css - we will not be discussing any details here.
Pull in Open Sans Google fonts just because you can. You can use any font that you like.
Routes for your Blog App
Now that we have grasped the basics of routes and views, let us start adding routing logic for all possible transactions by changing routes/index.js.
Base structure of routes
The basic structure of routes remains as-is. We will add a DB reference to enable us to query or update database for specific route transactions.
const express = require("express");
const router = express.Router();

const db = require("../data/db");

router.get("/", async (req, res) => {
  res.render("index");
});

module.exports = router;
Display a list of posts
Add route to show posts -
router.get("/blog", async (req, res) => {
  const posts = await db.from("posts").orderBy("created_at", "desc");
  res.render("blog/index", { posts: posts });
});
All we are doing here is to -
- get content from
poststable in databasedb.from("posts")ordered by created date - render the view
blog/index. Pass data from database to the view
We have already seen how to use variable values in the view - we will see actual code in the next section.
Display a specific post
Create a route/method to “show” a specific blog post.
router.get("/blog/:id", async (req, res) => {
  const post = await db.from("posts").where("id", req.params.id).first();
  res.render("blog/show", { post: post });
});
See the string :id in route url? This implies that id is a variable. For e.g. the URL can be http://localhost:9000/blog/1 (id = 1), http://localhost:9000/blog/42 (id = 42), and so on.
We query database for the specific id passed in the URL and, as was earlier, provide the data to the view.
While using id simply works, URLs with ids are not really user-friendly. Let us change it to include a URL-friendly version of our post title (called slug). Slug is a distinct column we created for the purpose, and we will use that column instead of id. For e.g. a post with title “Hello World!” can have the slug hello-world.
router.get("/blog/:slug", async (req, res) => {
  const post = await db.from("posts").where("slug", req.params.slug).first();
  res.render("blog/show", { post: post });
});
Let’s do one more thing while we are on this topic. Let us allow user to type content in markdown. This is not a problem while saving the record since we save the entries as-is, but we should render markdown as formatted HTML when showing the blog post. We can do that using a library called marked and combining that with a package or two to sanitize the HTML (purify / jsdom).
Install package -
npm i --save marked dompurify marked jsdom
Include the libraries in our route code -
const marked = require("marked");
const domPurify = require("dompurify");
const { JSDOM } = require("jsdom");
const purify = domPurify(new JSDOM().window);

router.get("/blog/:slug", async (req, res) => {
  const post = await db.from("posts").where("slug", req.params.slug).first();
  post.content = post.content ? purify.sanitize(marked(post.content)) : "";
  res.render("blog/show", { post: post });
});
Create a new post
We will create a route/view to display fields of a post and allow user to create new post.
router.get("/blog/new", async (req, res) => {
  res.render("blog/new", { post: {} });
});
post: {} passes an empty object called post to the view. We will tie the fields in the view to attributes of this object. We use an empty object here rather than not passing anything at all since we may want to change this in the future to default the values of few fields on the view. You can safely ignore this for now.
Save a post
Create a route to save a new post by using a POST transaction.
router.post("/blog", async (req, res) => {
  try {
    let postId = await db("posts")
      .insert({
        title: req.body.title,
        content: req.body.content,
        tags: req.body.tags,
      })
      .returning("id");
    res.redirect(`/blog/${id}`);
  } catch (e) {
    console.error(e);
  }
});
The function used in this route will perform below tasks -
- gets data passed in
req. In our case a view passes this data along after the user enters data and submits the form - inserts a record in
poststable and populates values - redirects to the URL
/blog/<some_id>. We have created the route for this previously - that route will fetch record with thisidand call the “show” view to display post details
Again, using id just works. But this is not quite what we want. Let us bring in slug here - but we want to solve the problem of converting title automatically to a slug. We do that using a package called slugify.
First, install slugify.
npm i --save slugify
Change the above logic -
router.post("/blog", async (req, res) => {
  try {
    const slug = slugify(req.body.title, { lower: true, strict: true });
    let postId = await db("posts")
      .insert({
        title: req.body.title,
        content: req.body.content,
        tags: req.body.tags,
        slug: slug,
      })
      .returning("id");
    res.redirect(`/blog/${id}`);
  } catch (e) {
    console.error(e);
  }
});
The logic here is simple and straight forward. But, what happens if you are saving an updated record? We would then need to define another route and specify a different service. To keep things simple, let us combine save function for both new and updated records -
router.post("/blog", async (req, res) => {
  try {
    let postId = 0;
    const slug = slugify(req.body.title, { lower: true, strict: true });

    if (!req.body.id) {
      postId = await db("posts")
        .insert({
          title: req.body.title,
          content: req.body.content,
          tags: req.body.tags,
          slug: slug,
        })
        .returning("id");
    } else {
      postId = await db("posts")
        .update({
          title: req.body.title,
          content: req.body.content,
          tags: req.body.tags,
          slug: slug,
        })
        .where("id", parseInt(req.body.id))
        .returning("id");
    }

    res.redirect(`/blog/${slug}`);
  } catch (e) {
    console.error(e);
    res.render("blog/new", { post: req.body });
  }
});
Edit a post
Editing a post includes two transactions-
- Query for a specific post (and hand it over to view)
- (Once user is done and clicks
Save) Collect details updated by user and hand it over to a route / service to save the changes
We will achieve the first part through the URL http://localhost:9000/blog/edit/<post_slug>.
router.get("/blog/edit/:slug", async (req, res) => {
  const post = await db.from("posts").where("slug", req.params.slug).first();
  res.render("blog/new", { post: post });
});
While we could use different routes/logic to save new posts and to save updated posts, here we keep things simple. We will reuse router.post("/blog", async (req, res) => {} function as described in the previous section to save updates.
More Views for Blog App
We are done with most of the routes. Let us create views to go along with them. Create a folder views/blog to store all blog related views in one place. Let’s start with the views.
Display a list of posts
Create a new view views/blog/index.ejs to show list of posts.
<html>
  <head>
    <%- include('../partials/head'); %>
  </head>

  <body>
    <%- include('../partials/nav'); %>
    <div class="postlist-nav">
      <div class="container">
        <a href="/blog/new"><button>New Post</button></a>
      </div>
    </div>
    <div class="container">
      <section>
        <% posts.forEach(post => { %>
        <aside>
          <h3 class="postlist-title"><%= post.title %></h3>
          <div class="post-meta">
            📅 <%= post.created_at.toISOString().substring(0,10) %> | 📁<%=
            post.tags %>
          </div>
          <p><%= post.content.substring(0,200) + '...' %></p>
        </aside>
        <a href="/blog/<%= post.slug %>">Read More</a>
        <% }); %>
      </section>
    </div>
    <footer><%- include('../partials/footer'); %></footer>
  </body>
</html>
We receive posts from the route file and display records here. A few more interesting observations -
- We can use expressions in our EJS templates. e.g.
<%= post.content.substring(0,200) + '...' %> - We can use loops to display repeated sections -
<% posts.forEach(post => { %>.<%will just perform calculations, while<%=will print out the result - You can use expressions in HTML tags or attributes
- Note that we pass arguments to the route with the link
<a href="/blog/<%= post.slug %>">Read More</a>
Navigate to https://localhost:9000/blog/ to see this view.
Display a specific post
Create a new view views/blog/show.ejs and include below code.
<html>
  <head>
    <%- include('../partials/head'); %>
  </head>

  <body>
    <%- include('../partials/nav'); %>
    <div class="container">
      <div style="text-align: end;">
        <a href="/blog/edit/<%= post.slug %>"><button>Edit</button></a>
      </div>
      <section>
        <h2 class="post-title"><%= post.title %></h2>
        <div class="post-meta">
          📅 <%= post.created_at.toISOString().substring(0,10) %> | 📁<%=
          post.tags %>
        </div>
        <p><%- post.content %></p>
      </section>
    </div>
    <footer><%- include('../partials/footer'); %></footer>
  </body>
</html>
This is very similar to what wee had earlier, but we just show one post rather than a bunch of posts.
The only additional thing to note is the redirection to edit view when user clicks on the edit post button.
Create a new post
Create new view views/blog/new.ejs -
<html>
  <head>
    <%- include('../partials/head'); %>
  </head>

  <body>
    <%- include('../partials/nav'); %>
    <div class="container">
      <section>
        <form action="/blog" method="POST">
          <%- include("_form_default") %>
        </form>
      </section>
    </div>
    <footer><%- include('../partials/footer'); %></footer>
  </body>
</html>
We have included a _form_default.ejs here instead of directly filling in the form fields for creating a new post. This is to encourage reuse of the form for both new and edit post functions.
Also take note of <form action="/blog" method="POST"> which redirects user to a route /blog with a method POST on submission of the form. The form is submitted at the click of Save button.
Create a new partial view views/blog/_form_default.ejs to house all controls of the form -
<div class="form-group">
    <label for="title">Title</label>
    <input class="postlist-header" name="title" id="title" type='text' label="tags" value="<%= post.title %>"  required></input>
    <label for="title">Tags 📁</label>
    <input id="tags" name = "tags" type="text" label="tags" required value="<%= post.tags %>">

    <p>
        <label for="content">Content</label>
        <textarea id="content" name="content" cols="30" rows="20" required><%= post.content %></textarea>
    </p>

    <input name="id" id="id" type="hidden" value="<%= post.id %>">
</div>
<div class="form-group">
    <button type="submit">Save</button>
</div>
The form is a standard HTML form except the values of the fields - they are derived from the query and passed across to EJS as a parameter.
Save a post
Take action when the data is posted to /blog route. We do all the required operations in the route file itself to keep things simple. In real world you may want to just keep routing logic here and hive everything else to separate JS files (& call them “services”).
router.post("/blog", async (req, res) => {
  try {
    let postId = 0;
    const slug = slugify(req.body.title, { lower: true, strict: true });

    if (!req.body.id) {
      postId = await db("posts")
        .insert({
          title: req.body.title,
          content: req.body.content,
          tags: req.body.tags,
          slug: slug,
        })
        .returning("id");
    } else {
      postId = await db("posts")
        .update({
          title: req.body.title,
          content: req.body.content,
          tags: req.body.tags,
          slug: slug,
        })
        .where("id", parseInt(req.body.id))
        .returning("id");
    }

    res.redirect(`/blog/${slug}`);
  } catch (e) {
    console.error(e);
    res.render("blog/new", { post: req.body });
  }
});
The actual DB save is self-explanatory and simple - thanks to knex. We perform an insert or update operation depending on whether id value already exists in the post object.
Once the record is saved, we show the saved post with res.redirect(/blog/${slug});
Editing a post
We used a route /blog/edit/:id to trigger edit logic. The route queries the DB and passes the specific post details along.
<html>
  <head>
    <%- include('../partials/head'); %>
  </head>

  <body>
    <%- include('../partials/nav'); %>
    <div class="container">
      <section>
        <form action="/blog" method="POST">
          <%- include("_form_default") %>
        </form>
      </section>
    </div>
    <footer><%- include('../partials/footer'); %></footer>
  </body>
</html>
We will reuse the route /blog with method POST to save record - you will see this in the submit action <form action="/blog" method="POST">.
Finis
So, there you have it - a beautiful looking blog app of your own! You can create new posts, display a list of posts, view single post and even edit it :). Want more? Comment and let me know!
See the complete code on the Github repo.