In this post let us see how we can easily build a task management app (which is totally & completely different from a todo app) using ReactJS. We will be using React Hooks, Chota CSS for styling and a lot of ES6+. We will not look at any centralised state management, or deal with a backend to store the tasks in this post.
Get Started
Use create-react-app to structure your project like any sane person would do -
npx create-react-app tasker-react-sample-app
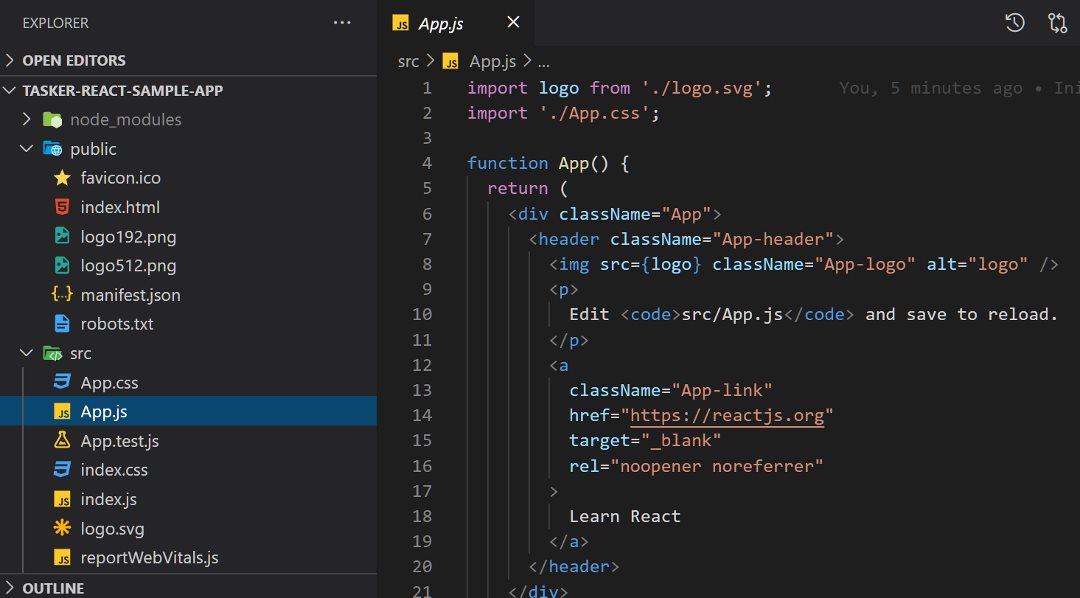
Proceed to have a dozen cups of coffee while your app gets initialised. Open the project root folder in VSCode to see this beautiful structure.
Start your app..
npm run start
Navigate to http://localhost:3000 in your browser to see the app.
While the create-react-app seems to do a lot of things (it does), you only need to care about a few things at this time -
- The app gets anchored with one HTML file
public/index.htmland in a single node<div id="root"></div>(for the most part, bear with me). The file itself will not have direct reference to the javascript - that will be done through a build step src/index.jsrefers to therootelementReactDOM.render( <React.StrictMode> <App /> </React.StrictMode>, document.getElementById("root") );Appinindex.jsis where you will start coding React magic. You shall use JSX in the React components to do all that magic, or you shall perish -function App() { return ( <div className="App"> <header className="App-header"></header> </div> ); }
Read more about JSX here, or just follow along by keeping mind two things -
- You can code all the HTML you want within JSX
- Use
classNameinstead ofclassto reference css classes - Use
{ }notation within JSX for expressions, variables etc.
Let’s do a quick take on how the components work. Create a new file src/components/HelloWorld.js -
export default function HelloWorld() {
  return (
    <>
      <h3>Hello World</h3>
    </>
  );
}
JSX can have only one root - <></> tags take care of that. Rest is just plain HTML.
Include HelloWorld in App.js -
import logo from "./logo.svg";
import "./App.css";

import HelloWorld from "./components/HelloWorld";

// ...
function App() {
  return (
    <div className="App">
      <header className="App-header">
        {/* - existing code goes here - */}
      </header>
      <HelloWorld />
    </div>
  );
}

export default App;
You can see the bold words in your app almost immediately.
Before we proceed, install a few things to make your React development easier -
- Install React Developer Tools. This will add a couple of tabs in your Chrome Developer Tools to view components. By default you should see
ComponentsandProfiler - Install VSCode extension ES7 React/Redux/GraphQL/React-Native snippets that will give you a bunch of useful snippets
You can use Emmet scripts to quickly create boilerplate and scripts - for e.g. create a new file and type in rfce and tab to see it in action.
Let us also include some styles, because well, we’re not cave-men.
Include the below line in your index.html to include a small, class-light library called chota.css -
<link rel="stylesheet" href="https://unpkg.com/chota@latest" />
Create a new file src/assets/styles.css and leave it blank for now. We will use it for custom styling. Include the file in App.js -
import "./assets/styles.css";
I will not really touch upon this topic again - but you can see the CSS code in the Github repo.
Creating Structure for your App
Let us create the basic elements for our app. First, the header - create a new file called src/components/Header.js.
function Header() {
  return (
    <div>
      <nav className="nav">
        <div className="nav-left">
          <a className="brand" href="#">
            Tasker
          </a>
        </div>
        <div className="nav-right">
          <div className="tabs">
            <a href="https://techformist.com">Techformist</a>
          </div>
        </div>
      </nav>
    </div>
  );
}

export default Header;
We have seen this earlier - JSX and stuff. The only difference is the CSS classes. Let’s include this Header in App.js.
// ...
import Header from "./components/Header";
// ... other code

function App() {
  return (
    // ...
    <div className="App">
      {/* .. */}
      <Header></Header>
      {/* .. */}
    </div>
  );
}
The above changes should give you a good idea about where we are going. We create a Header component, and include it in the main App so that it’s available everywhere in the app.
We can now include the main content just below Header.
Create Tasks Component
The simplest way to create a task component is familiar to us by now. Create a new file src/components/Tasks.js -
function Tasks() {
  return (
    <div className="row">
      <div className="col-12">Learn React</div>
      <div className="col-12">Profit</div>
    </div>
  );
}

export default Tasks;
Include Tasks in App.
// ...
import Tasks from "./components/Tasks";
// ... other code

function App() {
  return (
    // ...
    <div className="App">
      {/* .. */}
      <Header></Header>
      <button className="button">New</button>
      <Tasks></Tasks>
      {/* .. */}
    </div>
  );
}
You should now be able to see the tasks and a button “New” that doesn’t do anything.
Let’s level up. We will create a state variable tasks that will store tasks and can be accessible from different components. We could eventually use this variable to store tasks retrieved from a database or a file.
In the simplest design we could create tasks in Tasks component, but that would make it difficult to access in a different component. For example, we need tasks in both Tasks, which is a list of tasks, and TaskDetail, which shows the detail task and allows user to edit tasks. So, let’s create tasks in App.js for now.
import "./App.css";
import "./assets/styles.css";

import Header from "./components/Header";
import Tasks from "./components/Tasks";

import { useState } from "react";

function App() {
  const [tasks, setTasks] = useState([
    { desc: "Learn React", id: 1 },
    { desc: "Profit", id: 2 },
  ]);

  return (
    <div className="App">
      <Header></Header>
      <div className="container">
        <Tasks tasks={tasks}></Tasks>
      </div>
    </div>
  );
}

export default App;
We have done a couple of cool things here -
- Import
useStatefrom React - Create
tasksand initialize it.tasksis the variable name andsetTasksis used to set this variable with a value. We will not be usingsetTasksright now, but directly provide the initial value as a param touseStateconst [tasks, setTasks] = useState([ { desc: "Learn React", id: 1 }, { desc: "Profit", id: 2 }, ]); - Pass
tasksas props to theTaskscomponent
Let us receive tasks prop in our Tasks component.
function Tasks({ tasks }) {
  return (
    <div className="row">
      <div className="col-12 text-right">
        <button className="button primary">New</button>
      </div>
      {tasks.map((task) => {
        return (
          <div className="col-12 text-left" key={task.id}>
            <h4>{task.desc}</h4>
          </div>
        );
      })}
    </div>
  );
}

export default Tasks;
As you can see -
- We receive a destructured
tasksprop in the function. You could also define param as simplyprops(no brackets, no destructuring), and refer to tasks asprops.tasks - We cycle through
tasksand display individual task usingh3element. The brackets contain the overall expression in JSX{ tasks.map((task) => { return ( <div className="col-12 text-left" key={task.id}> <h4>{task.desc}</h4> </div> ); }); }
You should now see..
Create Task Component
Tasks component is doing too many things -
- List tasks
- Show task
- er.. that’s about it, but it has the potential to much more
Let’s break the component so that display of a task becomes concern of a different component.
Create a new file src/components/Task.js -
function Task({ task }) {
  return (
    <div className="col-12 text-left" key={task.id}>
      <h4>{task.desc}</h4>
    </div>
  );
}

export default Task;
The code is a direct copy of the fragment responsible to display a specific task in Tasks component.
Include Task in Tasks -
import Task from "./Task";
function Tasks({ tasks }) {
  return (
    <div className="row">
      <div className="col-12 text-right">
        <button className="button primary">New</button>
      </div>
      {tasks.map((task) => (
        <Task task={task} key={task.id} />
      ))}
      <div className="col-12"></div>
    </div>
  );
}

export default Tasks;
This is very similar to last time when we included one component in another. We are just using an additional attribute called key, which denotes the unique identifier of each element in the array (and that will be task.id in our case).
The added advantage of segregating task display is that we can use this Task component to display individual task anywhere in the application.
Fantastic.
Let us add more attributes to the task and beautify this a bit. Afterall, a task is not simply about the description.
Add more attributes to the task in App.
const [tasks, setTasks] = useState([
  { desc: "Learn React", id: 1, date: "2021-01-03 10:00", status: "Complete" },
  { desc: "Profit", id: 2, date: "2021-01-05 15:00", status: "Open" },
]);
Change Task.js to make tasks come alive -
function Task({ task }) {
  return (
    <div className="card text-left" key={task.id}>
      <div className="row">
        <div className="col-10">
          <h4>{task.desc}</h4>
          <div className="task-meta">
            <img
              src="https://icongr.am/feather/calendar.svg?size=12&color=b5b5b5"
              alt="calendar"
            />
            {task.date}
          </div>
        </div>

        <div className="col-2 is-center">
          <button className="button icon-only clear">
            <img
              src="https://icongr.am/feather/check-circle.svg?size=24&color=11d054"
              alt="Open"
            />
          </button>
        </div>
        <div className="col-12">
          <p>{task.remarks}</p>
        </div>
      </div>
    </div>
  );
}

export default Task;
And, voila..
Add Functionality: Complete Task
We have successfully displayed a task so far, but we don’t have any functionality enabled on the task. We will change that by inserting a button to toggle the task status.
Add a function that can get called to change status. If we had a global state (e.g. Redux), we would have more independence to decide where this function has to reside. Since we are using a simple state at App level, we will introduce the function to change that state also within App. Create a new function -
const onTglStatus = (task) => {
  console.log("completing task");
};
The child component (Tasks in our case) does not know about this method. We have to pass the function to the inner-most component that will call it for some greater good.
Change App.js to pass onTglStatus as a prop -
// ...
<Tasks tasks={tasks} onTglStatus={onTglStatus}></Tasks>
//  ...
Repeat the above code in Tasks.js -
function Tasks({ tasks, onTglStatus }) {
  // ...
  <Task task={task} onTglStatus={onTglStatus} />;
  // ...
}
Call the function in Task.js -
function Task({ task, onTglStatus }) {
  // ...
  <button className="button icon-only clear" onClick={() => onTglStatus(task)}>
    > "⬜"
  </button>;
  // ...
}
Click the button to see the debug statement in developer console.
We have moved props including variables(state) and functions that act on the state down the chain, and events get surfaced up the component chain!
Add the function to do something beyond just a debug statement in App.js -
const onTglStatus = (task) => {
  console.log("completing task");
  setTasks(
    tasks.map((chkTask) => {
      chkTask.complete =
        task.id === chkTask.id ? !chkTask.complete : chkTask.complete;
      return chkTask;
    })
  );
};
In the above code we use Array.map function to change status for the matching record. The matching record (task) is supplied by the function called by button click event.
Let us change the checkbox/button in indicate completed tasks in Task.js.
// ...
<button className="button icon-only clear" onClick={() => onTglStatus(task)}>
  {task.complete && "✅"}
  {!task.complete && "⬜"}
</button>
// ...
We use one of the old Javascript tricks to display ✅ when task is complete.
{task.complete && "✅"}evaluates to✅whentask.completeis true. Else this returns nothing- The next expression
{!task.complete && "⬜"}returns⬜whentask.completeis false
Since our application is reactive to changes and the button label gets driven by data, we see the below behaviour.
Add Functionality: Add Task
We need to get task data from user and save new tasks. To that end, add the function to save tasks onSaveTask in App.js -
const onSaveTask = ({ desc, date }) => {
  console.log("saving tasks");
  setTasks([
    { desc: desc, date: date, id: Date.now(), complete: false },
    ...tasks,
  ]);
};
We are using setTasks like before, but this time we are adding a new element to the array. Again, we don’t add the element directly to array since the state variable is immutable. We rather do this -
- create a new variable
- Add
{ desc: desc, date: date, id: Date.now(), complete: false },as the first element.descanddateare passed along by the form used to create new tasks.Date.now()is a simple way to make the id unique - Add the existing array elements to the new array variable
...tasks
Next, add a new form to collect data. Let’s create a new component src/components/TaskEdit.js. This component will receive the function onSaveTask as props and call it on button click.
import { useState } from "react";

function TaskEdit({ task, onSaveTask }) {
  const [desc, setDesc] = useState("");
  const [date, setDate] = useState("");

  const saveTask = (e) => {
    e.preventDefault();
    onSaveTask({ desc: desc, date: date });

    setDesc("");
    setDate("");
  };
  return (
    <div className="card">
      <h3>Add Task</h3>
      <form>
        <label htmlFor="desc">Description</label>
        <input
          type="text"
          name="desc"
          id="desc"
          value={desc}
          onChange={(e) => setDesc(e.target.value)}
        />

        <label htmlFor="date">Date</label>
        <input
          type="text"
          name="date"
          id="date"
          value={date}
          onChange={(e) => setDate(e.target.value)}
        />

        <div className="text-right">
          <button className="button dark" onClick={saveTask}>
            Save
          </button>
        </div>
      </form>
    </div>
  );
}

export default TaskEdit;
We have gone through some of the functions implemented here, while rest are mostly HTML -
const [desc, setDesc] = useState("");creates a new state variale local toTaskEditand initiates it to""- a standard HTML form displays a couple of text boxes to collect
descanddate Savebutton calls a local methodsaveTask, which will call theonSaveTaskfunction inApp.jsand resets form
Add functionality to New button so that it displays the TaskEdit component and associated form (and can also toggle to hide the form).
In App.js -
// ...
const [showTaskEdit, setShowTaskEdit] = useState(false);
// ...

<button
  className="button outline"
  onClick={() => setShowTaskEdit(!showTaskEdit)}>
  {!showTaskEdit && "New"}
  {showTaskEdit && "➖"}
</button>;

// ...
{
  showTaskEdit && <TaskEdit task={{}} onSaveTask={onSaveTask} />;
}
//  ...
We conditionally show TaskEdit only if showTaskEdit is true.
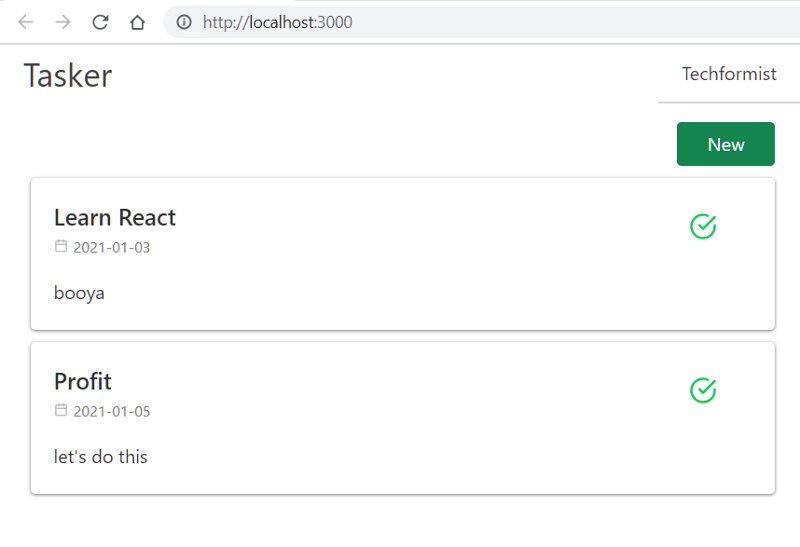
Time to see the complete application in action -
Next Steps
- Enable user to edit tasks to change description and dates
- Add a backend for your task manager
Code for this project is available in the Github repo.