I am quite excited with all the developments in the database world. While hosted database is not a new concept, we now have services that are -
- far more focused on usability - support intuitive data types, have spreadsheet-like experience
- have schema editors :)
- support simple migrations
- support more advanced functions like caching without need for black magic
- .. probably include more predictable pricing
Xata is one such database service that ticks a few boxes and is fairly new. In this post, let us look at how easy it is to create a simple contact application with Express and Xata.
1. Setup the project
Let us start by setting up the skeleton Express server.
Make sure you have Node installed on the computer. Create a folder for your project - I will call it crm-express-xata.
Install Express and Typescript with a few commands.
cd crm-express-xata
npm init -y
npm i express "@xata.io/cli" dotenv
npm i -d rollup typescript esbuild "@types/node" ts-node nodemon "@types/express"
node_modules/.bin/tsc --init
Here’s everything we installed -
express- Express serverdotenv- Import environment variables in the projectxata cli- Utility that simplifies creation of tables, and run various other commandsrollup,esbuild- Xata dependenciestypescript- We will use typescript with Expressts-node,nodemon- Automatically restart Express and appply changes as they happen (“hot reload”)@types/expressand@types/nodeto install types (and help ease our typing!)
You may want to install @xata.io/cli globally if you are planning to use the Xata CLI in multiple projects.
We round up the installation with tsc --init that will create a default tsconfig.json used by Typescript. Observe the file content until your head reels, and replace it with -
{
  "compilerOptions": {
    /* Language and Environment */
    "target": "es2016",
    "moduleDetection": "auto",

    /* Modules */
    "module": "commonjs",
    "rootDir": "src",
    "moduleResolution": "node",
    "allowSyntheticDefaultImports": true,
    "lib": ["esnext"],

    /* Emit */
    "outDir": "dist",
    "sourceMap": true,

    /* Interop Constraints */
    "esModuleInterop": true,
    "forceConsistentCasingInFileNames": true,

    /* Type Checking */
    "strict": true,

    /* Completeness */
    "skipLibCheck": true
  }
}
Create a new file called nodemon.json -
{
  "watch": ["src"],
  "ext": "ts,json",
  "ignore": ["src/**/*.spec.ts"],
  "exec": "ts-node ./src/index.ts"
}
nodemon along with ts-node will ensure that our changes are reflected as we develop the application. You can simply navigate to your project directory in a terminal, and call nodemon for the hot reloading to work.
Or, better yet - change the scripts section in package.json file to -
"scripts": {
    "dev": "nodemon",
    "test": "echo \"Error: no test specified\" && exit 1"
},
Create a new file called src/index.ts -
console.log ("hello world");
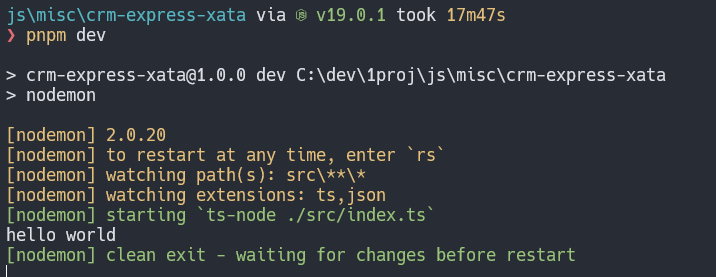
You can now type in npm dev to see your application in action.

Before we forget, let us create a .gitignore file to version control only those files that make sense. Use the below content for .gitignore for now -
node_modules
dist
.env
Alternatively, copy over the .gitignore content from the crm-express-xata repo.
If you don’t mind seeing more code in a demo project and want to simplify the setup, you can always use a starter template with this command - pnpx typescript-express-starter crm-express-xata. You can avoid all the manual steps of setting up Express and Typescript with that single command (you can then ignore the majority of steps in this section!).
2. Setup Xata
Head over to Xata and sign up for the free plan. With support for 750k records and 75 requests per second, we should be more than able to test the service in a pilot project.
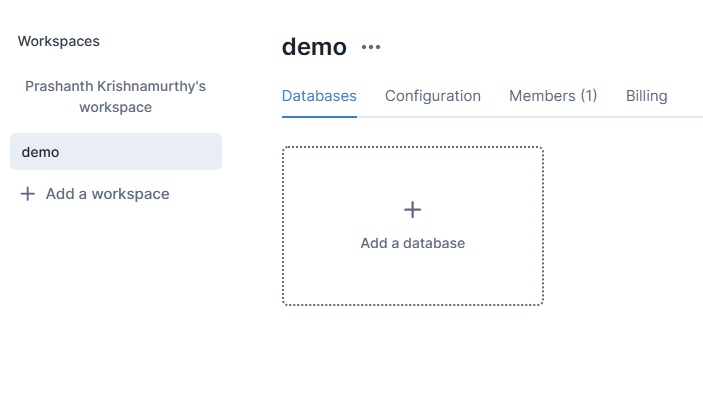
You will land up on a home page with a blank workspace.

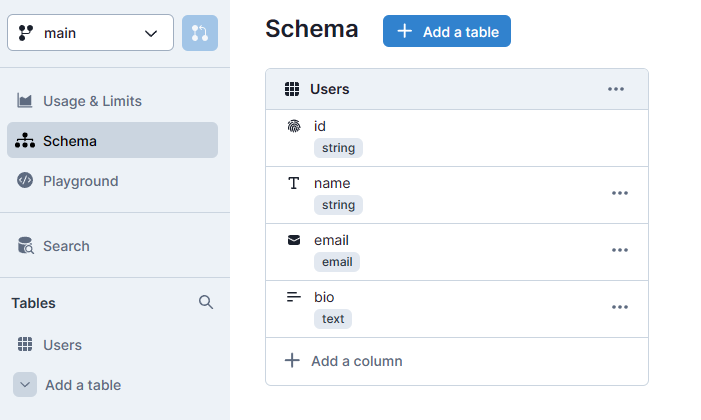
Create a database contactdb in your favourite region. Click on Schema link on the left navigation bar to visualize all tables (only one at this time), fields, and their relationships.

Add a table called contact with the following columns -
- name - of type
string,not null - email - of type
email
Column types are self explanatory and “linking” of the user table allows you to tag user records from the contact table.
Add other table(s) by clicking like crazy in your Xata workspace, and create the below table/columns.
- activity
- description |
string,not null - type
- status
- contact | link to
contacttable
- description |
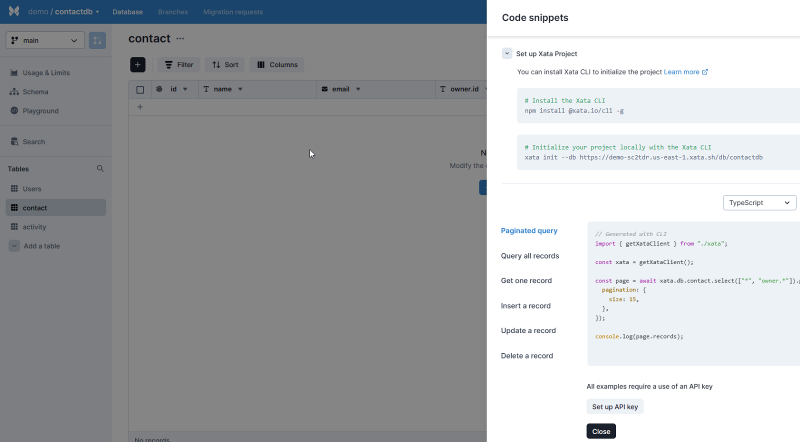
Click on any table from the left navigation bar under Tables header to see records in the table. Click on Get code snippet to see instructions on installing xata library and code snippets for accessing the table.

I will install Xata library as dev depedency since I don’t need them elsewhere.
npm install -d @xata.io/cli
Copy the URL from the init snippet.
xata init --db https://demo.us-east-1.xata.sh/db/contactdb
3. Code the foundation for Express
Create a .env file in your project root directory -
PORT=3000
The contents of the file will be used at various stages in the project.
Change the content of src/index.ts to -
import express, { Express, Request, Response } from "express";
import dotenv from "dotenv";

// read env file
dotenv.config();

// initialize
const app: Express = express();
const port = process.env.PORT || 3001;

app.get("/api", (req: Request, res: Response) => {
  res.json({ msg: "hello" });
});

app.listen(port, () => {
  console.log("Express server listening on port", port);
});
Here’s what we are doing here -
- Import
express,dotenv - Initiate
express - Create a simple test api at
/apithat responds with a simple JSON message - Start the server
Start the program with npm dev. Use your favourite API client to invoke a get request to http://localhost:3000/api to see the below response -
{
	"msg": "hello"
}
Now that we know the Express server is working, let us setup Xata in Express. Go back to the project directory in terminal and enter -
node_modules/.bin/xata init --db https://demo.us-east-1.xata.sh/db/contactdb
If you have installed the CLI globally, you just use xata init without prefix. You must replace the URL here with the one copied over from the code snippet from Xata website.
The init command will -
- prompt you to enter your credentials
- generate a secret key and update your key in
.envfile - create a
xata.tsfile that will provide the types for your database / tables
Neat.
4. Code the Contact Route
Create /services/contact.ts with one route -
import express, { Router, Request, Response } from "express";
import { XataClient } from "../xata";
import dotenv from "dotenv";

dotenv.config();

const router: Router = express.Router();
const xata = new XataClient();

router.get("/", async (req: Request, res: Response) => {
  try {
    console.log("Trying to get contact records..");
    let query = req.query;

    const rec = await xata.db.contact.filter(query).getMany();
    res.json(rec);

    console.log("..done");
  } catch (e: any) {
    res.status(500).send(e.toString());
  }
});

export default router;
xata.db.contact.filter(query).getMany() queries Xata for contact records.
In index.js, add -
import contact from "./services/contact";


// .. other code
app.use(express.json());

app.use("/api/contact/", contact);

// .. other code
app.listen(port, () => {
  console.log("Express server listening on port", port);
});
Save files to restart server and you should now be able to get all contact records at http://localhost:3000/api/contact.
You don’t need to code contact routes in a separate file, but this structure reduces some clutter in main.js (& helps to scale in future).
Let us code in other methods in contact.ts as well and the entire file should like this -
import express, { Router, Request, Response } from "express";
import { XataClient } from "../xata";
import dotenv from "dotenv";

dotenv.config();

const router: Router = express.Router();
const xata = new XataClient();

router.get("/", async (req: Request, res: Response) => {
  try {
    console.log("Trying to get contact records..");
    let query = req.query;

    const rec = await xata.db.contact.filter(query).getMany();
    res.json(rec);

    console.log("..done");
  } catch (e: any) {
    res.status(500).send(e.toString());
  }
});

router.get("/:id", async (req: Request, res: Response) => {
  try {
    const recId = req.params.id;
    console.log("Trying to query for", recId);

    if (typeof recId === "undefined") throw new Error("Id is undefined");
    res.json(await xata.db.contact.read(recId));
  } catch (e: any) {
    res.status(500).send(e.toString());
  }
});

router.post("/", async (req: Request, res: Response) => {
  try {
    console.log("Creating contact:", req.body);
    res.json(await xata.db.contact.create(req.body));
  } catch (e: any) {
    res.status(500).send(e.toString());
  }
});

router.patch("/:id", async (req: Request, res: Response) => {
  try {
    console.log("Updating contact:", req.body);
    res.json(await xata.db.contact.update(req.params.id, req.body));
  } catch (e: any) {
    res.status(500).send(e.toString());
  }
});

router.delete("/:id", async (req: Request, res: Response) => {
  try {
    console.log("Deleting contact:", req.params.id);
    res.json(await xata.db.contact.delete(req.params.id));
  } catch (e: any) {
    res.status(500).send(e.toString());
  }
});

export default router;
You should now be able to invoke the below methods.
- Create a new contact:
POST:http://localhost:3000/api/contact{ "name": "Jane Doe", "email": "jane@doe.com" } - Update a contact:
PATCH:http://localhost:3000/api/contact/rec_ceq4gkr6bfqmhh8thsdg, whererec_ceq4gkr6bfqmhh8thsdgis the contact id to update{ "name": "Jane Doe", "email": "jane@doe1.com" } - Delete a contact
DELETE:http://localhost:3000/api/contact/rec_ceq4gkr6bfqmhh8thsdg
We are also interested in getting activities for the contact. In other words, we want to get activities for a given contact id.
Add a different route handler in the same contact.ts file at the very end (just before the export statement)-
// other code

router.get("/:id/activity", async (req: Request, res: Response) => {
  try {
    const recId = req.params.id;
    console.log("Trying to query for", recId);

    if (typeof recId === "undefined") throw new Error("Id is undefined");

    let query = { contact: { id: recId } };
    const rec = await xata.db.activity.filter(query).getMany();

    res.json(rec);
  } catch (e: any) {
    res.status(500).send(e.toString());
  }
});

export default router;
You should now be able to invoke http://localhost:3000/api/contact/rec_cepc3ptvjen51bb31gig/activity to get all activities for the contact id rec_cepc3ptvjen51bb31gig.
5. Code the Activity Route
Add code to handle Activity methods similar to Contact.
Create a new file /services/activity.ts -
import express, { Router, Request, Response } from "express";
import { XataClient } from "../xata";
import dotenv from "dotenv";

dotenv.config();

const router: Router = express.Router();
const xata = new XataClient();

router.get("/:id", async (req: Request, res: Response) => {
  try {
    const recId = req.params.id;
    console.log("Trying to query for", recId);

    if (typeof recId === "undefined") throw new Error("Id is undefined");
    res.json(await xata.db.activity.read(recId));
  } catch (e: any) {
    res.status(500).send(e.toString());
  }
});

router.post("/", async (req: Request, res: Response) => {
  try {
    console.log("Creating activity:", req.body);
    res.json(await xata.db.activity.create(req.body));
  } catch (e: any) {
    res.status(500).send(e.toString());
  }
});

router.patch("/:id", async (req: Request, res: Response) => {
  try {
    console.log("Updating activity:", req.body);
    res.json(await xata.db.activity.update(req.params.id, req.body));
  } catch (e: any) {
    res.status(500).send(e.toString());
  }
});

router.delete("/:id", async (req: Request, res: Response) => {
  try {
    console.log("Deleting activity:", req.params.id);
    res.json(await xata.db.activity.delete(req.params.id));
  } catch (e: any) {
    res.status(500).send(e.toString());
  }
});

export default router;
Add pointer to this handler in index.ts -
app.use("/api/activity/", activity);
You should now be able to invoke activity methods as easily -
POST:http://localhost:3000/api/activityPATCH:http://localhost:3000/api/activity/some_activity_idDELETE:http://localhost:3000/api/activity/some_activity_id
6. Conclusion
Congratulations, you have built your own CRM app that can track contacts and activities. Find the complete code on this Github repository.
In summary, you have seen how simple it is to use Xata in Express.
You can further explore -
- Xata support to apply changes and learn how DB changes can tag along the branches - https://xata.io/docs/api-reference/dbs/db_name#list-branches
- Import CSV file to your DB with CLI - https://xata.io/docs/cli/import-data
- Adding basic auth - https://xata.io/docs/quickstart/adding-basic-auth-with-xata
Overall Xata, while quite new, has a few positives going for it -
- Easy to use ORM experience, similar to that in Prisma
- Easy to use, but powerful search & analytics features
- Combines the power of PostgreSQL (which is the DB backend for Xata) with Elastic search for proven search functions. See https://xata.io/docs/intro/how-it-works
- Cool branching & migration features
Be prepared for a few downsides -
- Lack of help in the wild
- While the documentation is decent, has limited examples. I don’t see the current documentation structure to be intuitive, but that may be just me
- Not fully tested in real-world