Applications in Electron are great, but they are also heavy and slow. I have been looking for a way to build an app that can be -
- universal (kinda - I will start with desktop experience for the masses but will eventually gravitate towards everything, everywhere, all at once)
- light weight - space and memory
- fast
Just to set the frame of reference - what I want from UI development is ease of development - html, css, and js and other such delightful technologies make things easy, GTK / Xamarin / Qt / WinForms / WPF / etc. are not so much fun.
What better way to do most of the features outlined here than in Go? This is an attempt to build a simple todo app using the combined power of Go and web technologies.
We will start with a simple window with webview in Golang, and then move to Wails to see how it makes the entire experience better. We will also see how to incrementally add functionality to the app.
Getting Started: Installation & Setup
If you intend to follow along, ensure you have Go on the system. If you don’t, you can get it from here.
Having VSCode from here and the Golang extension from here will be helpful.
Once the entire setup is done, create a new folder, open a terminal either in explorer or from VSCode, and create a new Go project -
go mod init go-webview-todo
This will create a go.mod file in the project root - it will be used to manage dependencies. Open the project folder in VSCode.
Create a file called main.go -
package main

print("Hello World")
Now, run the file using the Run button in VSCode or using a terminal. You should see the output in the terminal.
Now that everything is running with your setup, we will focus on next steps.
Install Dependencies
There are more than a few options to create webview apps -
- zserge/webview Simple, cross-platform, portable, and lightweight. It is a tiny cross-platform webview library for C/C++/Golang to build modern cross-platform GUIs. It supports two-way JavaScript bindings (to call JavaScript from C/C++/Go and to call C/C++/Go from JavaScript). Needs CGO and some special flags to run on Windows.
- Go bindings for webview library webview/webview_go Underlying library was intended for C/C++, but has a Go wrapper around it.
- ImVexed/muon Uses Ultralight, a cross-platform WebKit rewrite in C++, instead of Chrome. Lightweight alternative to Electron. Not maintained actively anymore.
- Advanced / fully-featured libraries like wailsapp/wails or fyne-io/fyne May use webview libraries in the backend, but abstract away the entire setup and make the entire experience pleasant. We will get to this state at the very end.
.. and more.
We will start with the simplest option - zserge/webview.
Develop a simple window with webview in Golang
Install the library using go get -
go get github.com/zserge/webview
Create a new file called main.go and add the following code -
package main

import "github.com/zserge/webview"

func main() {

	w := webview.New(webview.Settings{
		Title:                  "My test web view app",
		URL:                    "http://google.com",
		Width:                  1000,
		Height:                 800,
		Resizable:              true,
		Debug:                  true,
		ExternalInvokeCallback: nil,
	})
	defer w.Destroy()

	w.SetTitle("My App")
	w.Navigate("https://google.com")
	w.Run()
}
You should see a nice window.. in theory. In practice I could not get my module to work in Windows. I gave up after a few tries.
Close to the webview package is webview2 - jchv/go-webview2. This library does not need CGO but is Windows specific.
Install webview2 with -
go get "github.com/jchv/go-webview2"
Change the code in main.go ever so slightly -
package main

import "github.com/jchv/go-webview2"

func main() {

	w := webview2.NewWithOptions(webview2.WebViewOptions{
		Window:        nil,
		Debug:         true,
		DataPath:      "",
		AutoFocus:     false,
		WindowOptions: webview2.WindowOptions{Title: "Demo View", Width: 1000, Height: 800},
	})
	w.SetSize(800, 600, webview2.HintFixed)
	w.Navigate("https://google.com")
	defer w.Destroy()

	w.Run()
}
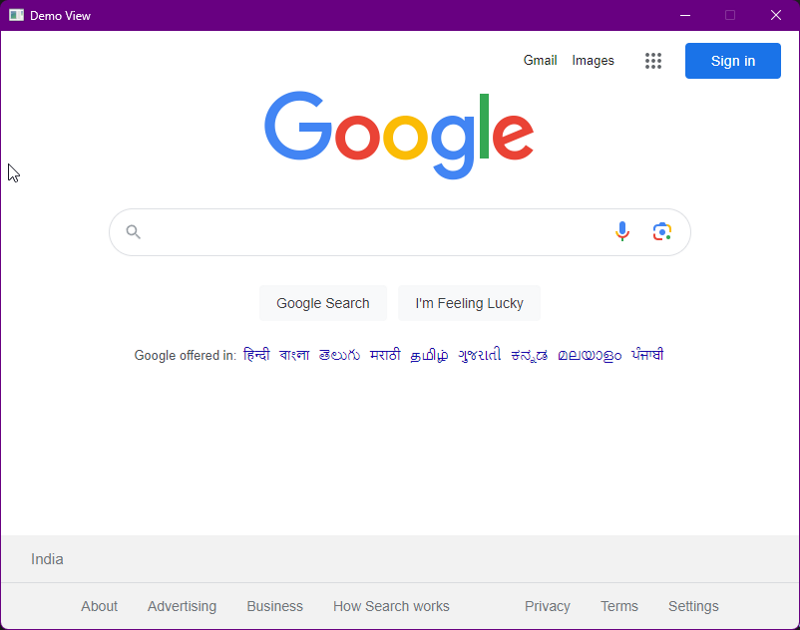
And, voila -
Moving to Wails
While the code above is pretty simple and straight-forward, the developer experience may not be the best. Let’s see whether that changes with Wails.
First, install Node if you don’t already have it.
Install Wails in your project folder.
go install github.com/wailsapp/wails/v2/cmd/wails@latest
In Terminal, hit the below command to check whether Wails has been installed correctly -
wails doctor

See the Wails documentation if you are facing any issues.
Now, let’s create a new project using Wails. Note that we will be using Vue for the frontend.
wails init -n go-webview-wails-todo -t vue
React, Svelte or vanilla JS are supported Wails OOB, and there are more community-supported templates for other frameworks.
Open the project folder in VSCode.Change the statement module changeme in go.mod to module go-webview-wails-todo. Update the README if you want.
Run the app -
wails dev
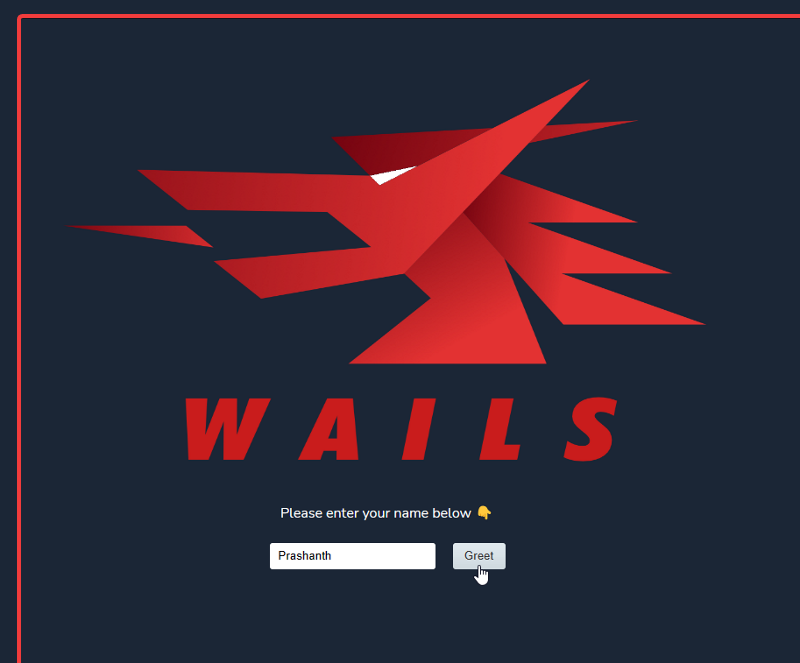
This should start your application.
Add a simple function to app.go -
func (a *App) TodoList() []string {
	return []string{"todo1", "todo2", "todo3"}
}
Include some ready styling with chota css with the below line in head section of frontend/index.html -
<link rel="stylesheet" href="https://unpkg.com/chota@latest">
Update the frontend/src/App.vue file to display the list of todos -
<script setup>
import { ListTodos } from '../wailsjs/go/main/App'

const todos = reactive({ data: [] });

const getTodoList = async () => {
  todos.data = await ListTodos()
  console.log('todos.data: ', ...todos.data);
}
onMounted(() => {
  getTodoList()
  console.log(`Fetched todos..!`, todos.data)
})

</script>

<template>
  <div class="container">
    <nav class="nav">
      <div class="nav-left">
        <a class="brand" href="#">Wails Todos!</a>
      </div>
    </nav>
    <div class="row">
        <div class="col-12">
          {{todos.data}}}
        </div>
    </div>
  </div>
</template>
You should see the list of hard-coded todos in the app.
Couple of really cool things happened so far -
- The logic you wrote in Go is available in the frontend as a function. You can call it from the frontend and use the data in the frontend. All you needed to do was to add the function to the
Appstruct inapp.goand wails took care of the rest. - You will see
wails.jsfolder with Go APIs being exposed to the frontend as JS functions. You would also see types generated out ofstructif we had used Typescript wailscommand did the hot-reload for both golang and vue, and bound everything together for you. You did not have to do anything else other than focus on the app logic
Adding functionality to our wails app
Let’s make our app easier to read / maintain with a few changes.
Add the below struct to app.go -
type todo struct {
	Id          int    `json:"id"`
	Description string `json:"description"`
	Due         string `json:"due"`
	Status      string `json:"status"`
	Created     string `json:"created"`
}
Notice the capital letters for Id, Description etc. - that is Go way of making fields public and accessible from outside the package.
After Greet function, introduce the below code -
func (a *App) ListTodos() []todo {
	return []todo{{Id: 1, Description: "Code Go", Due: "2023-10-15", Status: "In Progress", Created: "2023-10-01 18:30"}}
}
func (a *App) CreateTodo(todoItem todo) todo {
	log.Println(todoItem)
	return todo{Id: 1, Description: "Code Go", Due: "2023-10-15", Status: "In Progress", Created: "2023-10-01 18:30"}
}
We are yet to implement a database -
- The dummy data in
ListTodoswill be replaced with actual data from a database CreateTodowill be used to create a new todo item
The functions just return “some” data to demonstrate how the todo, a struct in Golang is available to the frontend. Click on them buttons to see output in console - both in Terminal running go and in the browser.
The changes in Vue are more extensive -
- Create Vue components for list and new todos
- Change
TodoList.vueto point to the new components - Add some custom styling in
styles.css(after removing the existing content)
I have just included the code from TodoList.vue below, but you can see the entire code in the repo.
<template>
    <div class="todolist">
        <div v-for="todo in todos.data" :key="todo">
            <div class="todo-item row">
                <div class="col-1">
                    <input type="checkbox" name="status" id="status" :checked="todo.status == 'Complete' ? true : false"
                        @click="updateTodo(todo)">
                </div>
                <div class="col-3 dates">
                    <img src="https://icongr.am/feather/calendar.svg?size=14&color=D3D3D3" alt=""> {{
                        todo.due?.substring(0, 10) }}
                </div>
                <div class="col-7">
                    {{ todo.description }}
                </div>
                <div class="col-1">
                    <a class="button error cardaction " @click="deleteTodo(todo)"><img
                            src="https://icongr.am/feather/trash-2.svg?size=24&color=FFFFFF"></a>
                </div>
            </div>
        </div>
    </div>
</template>

<script setup>
const props = defineProps(['todos'])
import { UpdateTodo, DeleteTodo } from '../../wailsjs/go/main/App'
const emit = defineEmits(['updateTodo', 'deleteTodo'])

const updateTodo = async (todo) => {
    console.log(`Emitting updateTodo event..!`)
    todo.status = todo.status == "Complete" ? "In Progress" : "Complete"

    const todoResponse = await UpdateTodo(todo)
    console.log('todoResponse: ', todoResponse);
    emit('updateTodo', todo)
}

const deleteTodo = async (todo) => {
    console.log(`Emitting deleteTodo event..!`)
    const todoResponse = await DeleteTodo(todo)
    console.log('todoResponse: ', todoResponse);
    emit('deleteTodo', todo)
}

</script>
And.. tada..
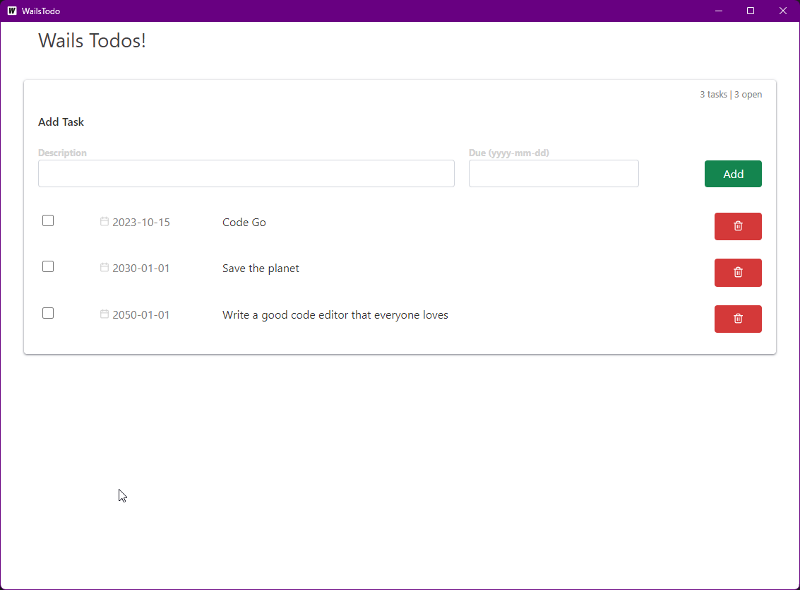
You can also see the output in a browser - just navigate to http://localhost:34115/. The browser window will be useful to refresh on demand and also see errors in the console faster.
Adding the database
We will use SQLite and gorm as the ORM for our app. Include the below libraries in app.go -
import(
  // ...
  "github.com/glebarez/sqlite"
	"gorm.io/gorm"
)
On VSCode, you can follow editor prompts to go get both packages.
Now, include db in App struct -
type App struct {
	ctx context.Context
	db  gorm.DB
}
Modify the todo struct to make it special -
type todo struct {
	Id          int       `json:"id"`
	Description string    `json:"description"`
	Due         time.Time `json:"due" gorm:"type:datetime"`
	Status      string    `json:"status"`
	Created     time.Time `json:"created" gorm:"autoCreateTime;type:datetime"`
	Updated     time.Time `json:"updated" gorm:"autoUpdateTime;type:datetime"`
}
In the startup function (func (a *App) startup(...)), add the below code -
func (a *App) startup(ctx context.Context) {
  db, err := gorm.Open(sqlite.Open("data.db"), &gorm.Config{})
	if err != nil {
		log.Fatal("failed to connect database" + err.Error())
	}
	a.db = *db
	log.Println("Connected to database. db exists: " + fmt.Sprintf("%t", db != nil))

	// AutoMigrate will create the todos table if it does not exist
	if !db.Table("todos").Migrator().HasTable("todos") {
		err = db.AutoMigrate(&todo{})
		if err != nil {
			log.Fatal("Failed to migrate database" + err.Error())
		}
	}
}
The startup function is called when the app starts. We are using it to connect to the database and create the todos table if it does not exist.
Modify the previous functions to manipulate the DB.
func (a *App) ListTodos() []todo {
	// return []todo{{Id: 1, Description: "Code Go", Due: "2023-10-15", Status: "In Progress", Created: "2023-10-01 18:30"}}
	var todos []todo
	result := a.db.Find(&todos)
	if result.Error != nil {
		panic("Failed to retrieve todos: " + result.Error.Error())
	}
	return todos
}

func (a *App) CreateTodo(todoItem todo) todo {
	log.Println("Create: " + prettyPrint(todoItem))
	// todoItem.Due, _ = time.Parse(time.RFC3339, todoItem.Due.String())

	result := a.db.Create(&todoItem)

	if result.Error != nil {
		log.Println("Failed to create todo item: " + result.Error.Error())
		return todo{}
	}

	log.Println("db result: " + prettyPrint(result))
	return todoItem
}
func (a *App) UpdateTodo(todoItem todo) todo {
	log.Println("Update: " + prettyPrint(todoItem))

	result := a.db.Save(&todoItem)
	if result.Error != nil {
		log.Println("Failed to update todo item: " + result.Error.Error())
		return todo{}
	}

	log.Println("update result: " + prettyPrint(todoItem))
	return todoItem
}
func (a *App) DeleteTodo(todoItem todo) todo {
	log.Println("Delete: " + prettyPrint(todoItem))

	result := a.db.Where("id = ?", todoItem.Id).Delete(&todoItem)
	if result.Error != nil {
		log.Println("Failed to delete todo item: " + result.Error.Error())
		return todo{}
	}
	log.Println("delete result: " + prettyPrint(todoItem))
	return todoItem
}

func prettyPrint(i interface{}) string {
	s, _ := json.MarshalIndent(i, "", "\t")
	return string(s)
}
That is it! You now have a fully functional todo app with a database backend.
Building your app
Building the app is as simple as -
wails build
You should now see a fully decked up, single executable file in build\bin folder. Key points to note -
- the file measures some 13 MB
- uses ~18 - 25 MB RAM
The above measures should provide you a quick idea of the size compared to Electron-based apps (starts from ~85 MB - easily 100 MB+ on disk, 100-200 MB RAM) and native apps (may be in kb’s - to a few MBs, and a couple of MBs of RAM).
Note that the db file is not included in the build - the program will just create the database file in the same folder as the executable (& that may be different from the time you were developing the app).
Conclusion
The todo app is a good start, but there are many features of Wails that I am yet to look into including real-time events and using deskop APIs. You can see/ play around with the complete code on Github.
Overall, Wails is a great way to build apps with Go and web technologies. It is easy to get started, and the developer experience is great.
Of course, this post would not be complete without mentioning the power of the web and how a few talented individuals (Lea Anthony in this case) and supportive communities can do for the ecosystem.