There was a time to be scared of the auth in ASP.NET. Identity really makes it easy. But before delving any further, let’s keep the tradition alive by knowing the ancient Roman history of auth in ASP.NET.
How Auth was done earlier?
- Manual Token Generation: Developers manually created JWT tokens using libraries like System.IdentityModel.Tokens.Jwt and hardcoded key management.
- No Built-in User Management: Handling user registration, login, password hashing, and role management required custom code.
- Manual Claims Management: Claims (roles, permissions) were added to JWT tokens manually, increasing the risk of errors.
- Token Validation: Developers manually validated JWT tokens in each request, including signature, expiration, and claims validation.
- No Built-in Features for Role Management: Handling user roles and claims for authorization were complex
It’s not uncommon to see code like this even today (there continue to be valid use cases, of course).
var key = new SymmetricSecurityKey(Encoding.UTF8.GetBytes("YourSecretKey"));
var creds = new SigningCredentials(key, SecurityAlgorithms.HmacSha256);

var claims = new[]
{
    new Claim(JwtRegisteredClaimNames.Sub, "username"),
    new Claim(JwtRegisteredClaimNames.Jti, Guid.NewGuid().ToString())
};

var token = new JwtSecurityToken(
    issuer: "yourdomain.com",
    audience: "yourdomain.com",
    claims: claims,
    expires: DateTime.Now.AddMinutes(30),
    signingCredentials: creds);

// create token
var tokenString = new JwtSecurityTokenHandler().WriteToken(token);


// time passes..
//
// time now to validate in another part of the code..
// validate token

services.AddAuthentication(options =>
    {
        options.DefaultAuthenticateScheme = JwtBearerDefaults.AuthenticationScheme;
        options.DefaultChallengeScheme = JwtBearerDefaults.AuthenticationScheme;
    })
    .AddJwtBearer(options =>
    {
        options.TokenValidationParameters = new TokenValidationParameters
        {
            ValidateIssuer = true,
            ValidateAudience = true,
            ValidateLifetime = true,
            ValidateIssuerSigningKey = true,
            ValidIssuer = "yourdomain.com",
            ValidAudience = "yourdomain.com",
            IssuerSigningKey = new SymmetricSecurityKey(Encoding.UTF8.GetBytes("YourSecretKey"))
        };
    });
Roll-in Identity
- Built-in User and Role Management
- Identity provides a complete user management system with built-in support for user registration, login, password hashing, and role management.
- No need to manually store user credentials or roles in the database; Identity handles it through its own entity models (e.g., IdentityUser, IdentityRole).
- Automatic Token Generation and Validation
- Identity integrates easily with JWT authentication, automatically handling token generation, validation, and expiration management.
- Developers no longer need to manually create or validate tokens using JwtSecurityTokenHandler.
- Claims and Role Management: Manage claims and roles through simple, high-level APIs (UserManager, RoleManager), which abstract away the complexity of managing claims in the token payload manually.
- Out-of-the-Box (“OOB”) Security
- OOB industry-standard security practices such as password hashing (with customizable password policies) and token expiration management - reduce security risks.
- Built-in support for multi-factor authentication (MFA), account lockout, and password recovery without custom implementations.
- Simplified Middleware Integration
- Easily integrated into the ASP.NET middleware pipeline - no need to manually configure authentication schemes or token validation parameters.
- Built-in Identity middleware automatically manages authentication cookies and tokens.
- Flexible Data Store: Work with multiple data stores (SQL Server, MySQL, etc.) by default
- Support for External Authentication Providers: Integrating OAuth providers like Google, Facebook, and Microsoft is simplified
Identity in Action: A Simple Demo
Create a new project..
dotnet new webapi -n dotnet-api-auth-demo
Add the below packages..
- Microsoft.EntityFrameworkCore.Sqlite
- Microsoft.EntityFrameworkCore.Design
- Microsoft.EntityFrameworkCore.Tools
- Microsoft.AspNetCore.Identity.EntityFrameworkCore
The first three are for Entity Framework Core and for using a SQLite database. The last one is for Identity.
Create the ApplicationDbContext class like as God intended. However, inherit from IdentityDbContext this time.
using Microsoft.AspNetCore.Identity;
using Microsoft.AspNetCore.Identity.EntityFrameworkCore;
using Microsoft.EntityFrameworkCore;

public class ApplicationDbContext : IdentityDbContext<IdentityUser>
{
  public ApplicationDbContext(DbContextOptions<ApplicationDbContext> options) : base(options)
  {
  }
}
IdentityDbContext will add magic that we are about to experience.
Add three lines of code in Program.cs.
builder.Services.AddAuthorization();
builder.Services.AddIdentityApiEndpoints<IdentityUser>().AddEntityFrameworkStores<ApplicationDbContext>();
// add the above lines before initializing `app`

var app = builder.Build();

// add the below line after `app` is initialized
app.MapIdentityApi<IdentityUser>();
AddEntityFrameworkStoresshows which database to use. In this case, we are using SQLite and using the mainApplicationDbContextitself. We could have used a different auth database as easily.MapIdentityApiautomatically adds the necessary routes for Identity.
Since we have no other endpoints, add auth to the default weatherforecast endpoint using RequireAuthorization().
app.MapGet("/weatherforecast", () =>
{
    var forecast = Enumerable.Range(1, 5).Select(index =>
        new WeatherForecast
        (
            DateOnly.FromDateTime(DateTime.Now.AddDays(index)),
            Random.Shared.Next(-20, 55),
            summaries[Random.Shared.Next(summaries.Length)]
        ))
        .ToArray();
    return forecast;
})
.WithName("GetWeatherForecast")
.WithOpenApi().RequireAuthorization();
Do a build to ensure there are no errors.
dotnet build
Migrate the database.
dotnet ef migrations add InitAuth -o Data/Migrations
dotnet ef database update
Run the application.
dotnet run
Navigate to http://localhost:5001/swagger/index.html to see the Identity endpoints.
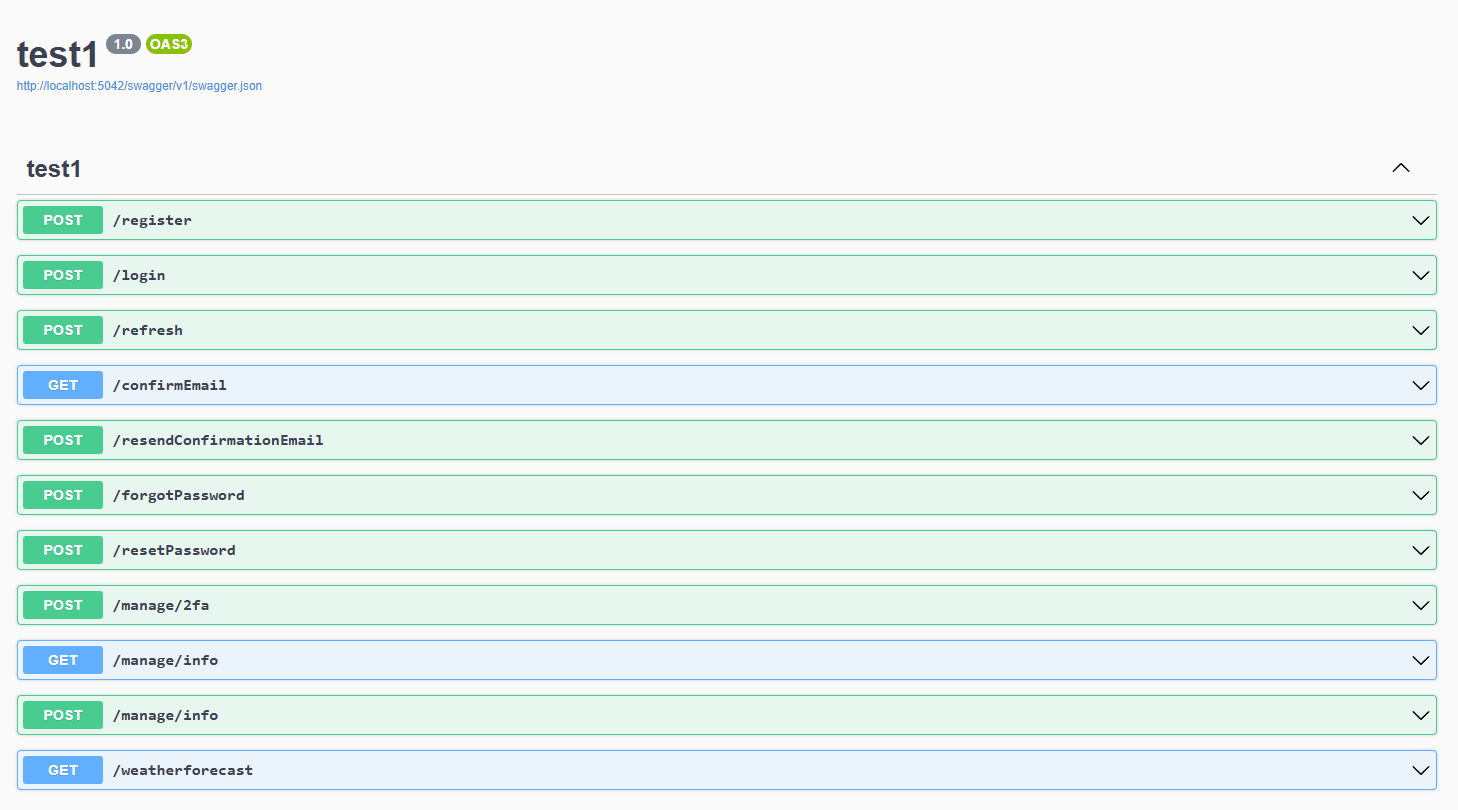
You can test the auth endpoints using Swagger, or as I prefer - Insomnia/Postman REST clients.
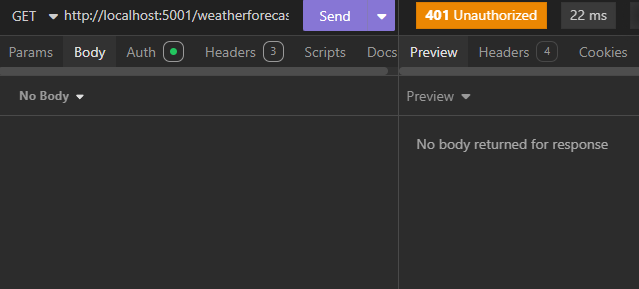
First, do a GET to http://localhost:5001/weatherforecast to see a 401 Unauthorized response.
Now, call the register to create a user, and subsequently, the login endpoint to get a token.
POST http://localhost:5001/register
{
  "email": "a1@a.com",
  "password": "Pass@123"
}
POST http://localhost:5001/login
{
  "email": "a1@a.com",
  "password": "Pass@123"
}
You should get the token response.
{
  "tokenType": "Bearer",
  "accessToken": "CfDJ8AcfSlDrZbhNlphsDvuO8gDgQty5M...",
  "expiresIn": 3600,
  "refreshToken": "CfDJ8AcfSlDrZbhNlphsDvuO8gD60O..."
}
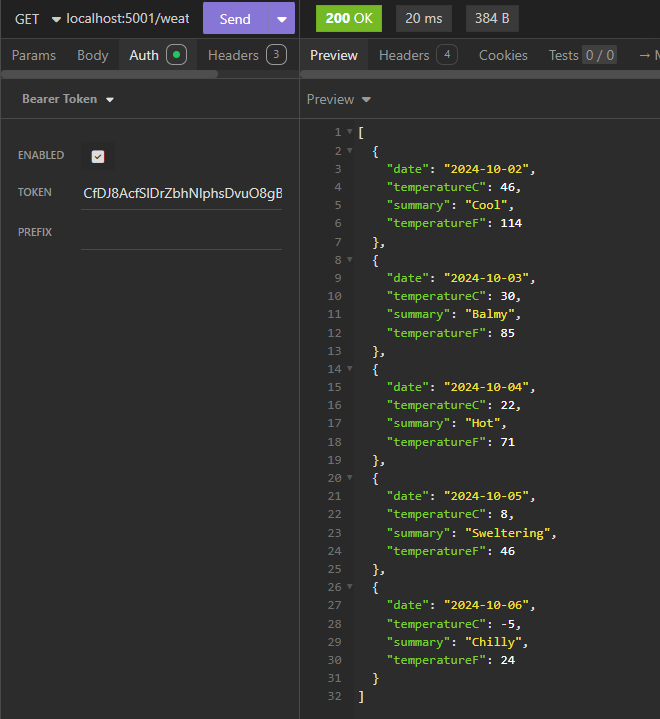
Use the access token to call the weatherforecast endpoint and see the glorious response.
We have just scratched the surface of Identity in .NET. There is a lot more to explore, including:
- Account lockout/ recovery
- Password policies
- Claims and roles management
- Customizing Identity
- Using external providers
- Role-based authorization
- Multi-factor authentication
Conclusion
Check out the full code on GitHub.